New Blog
My blog has moved to its now at creativebrewings.wordpress.com
Artist, Designer, and Professional Dabbler
My blog has moved to its now at creativebrewings.wordpress.com
Finding my style was something I fought with for my entire adult artist life. There are some artist you can see their work and immediately recognize it. In the age of Instagram and social media showing you constant slew of talented artist, it can be easy to start the comparison game. I would find myself comparing myself to other artists who had this obvious and identifiable voice in their art. Meanwhile, my work felt like it didn’t look like anyone’s art not even my own. Today I finally feel like I found my style and voice as an artist. Here is how I found it.
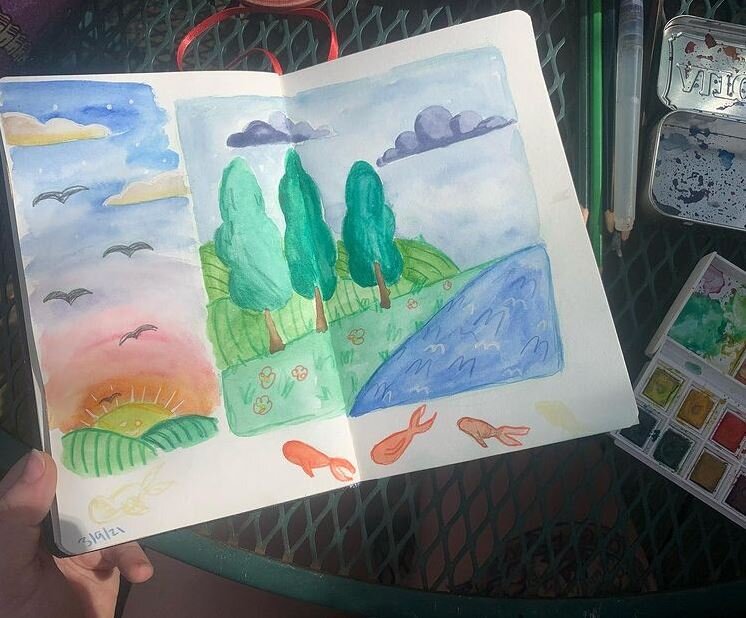
First lets look at some of my earlier work to see a time when I didn’t feel like I had a style.
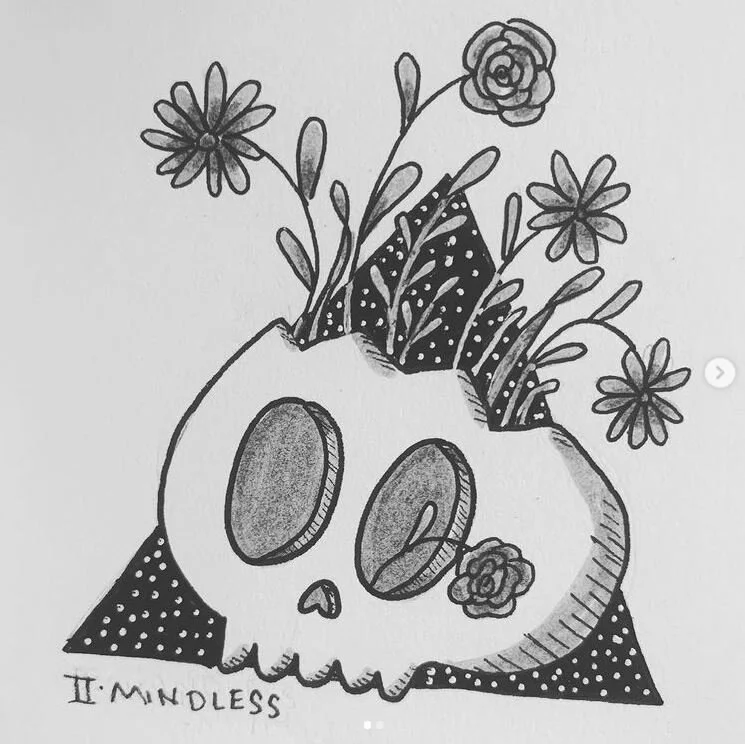
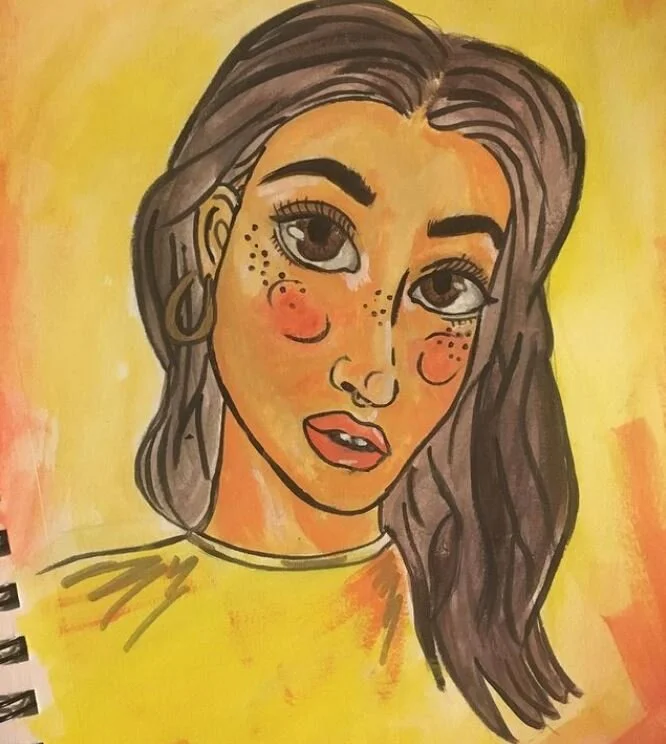
When I look at these what I see is me trying to create based on someone else’s artist style and voice. In the last painting specifically, I did not see my style but looking back it was always there.
In 2020 I took a class on Skillshare to find my artistic style. The first portion of the class we went over the elements and principles of art. We did this to be able to look at art and be able to talk about it.
The elements of art are shape, color, form, value, space, color, texture, and line.
The principles of art are unity, balance, proportion, emphasis, pattern, movement, and variety.
If you want to know more about these here is an article that explains the elements and principles. We then had a task of creating a mood board from artist and art work that we like. We then wrote and essay about the mood board we created and what we liked about the pieces using the elements and principles. Here is what my mood board looked like.
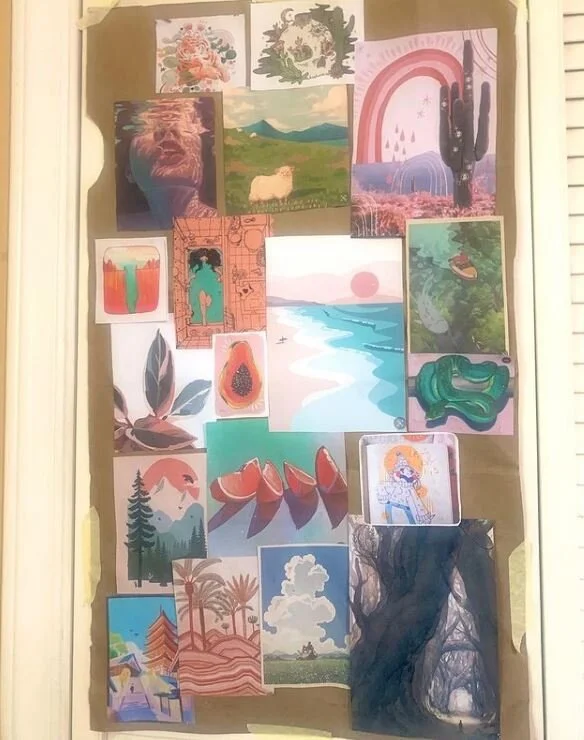
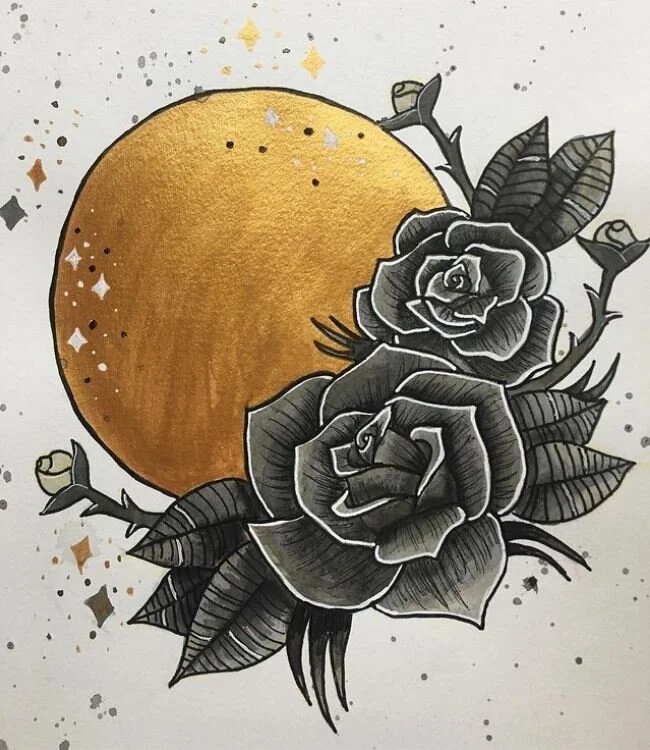
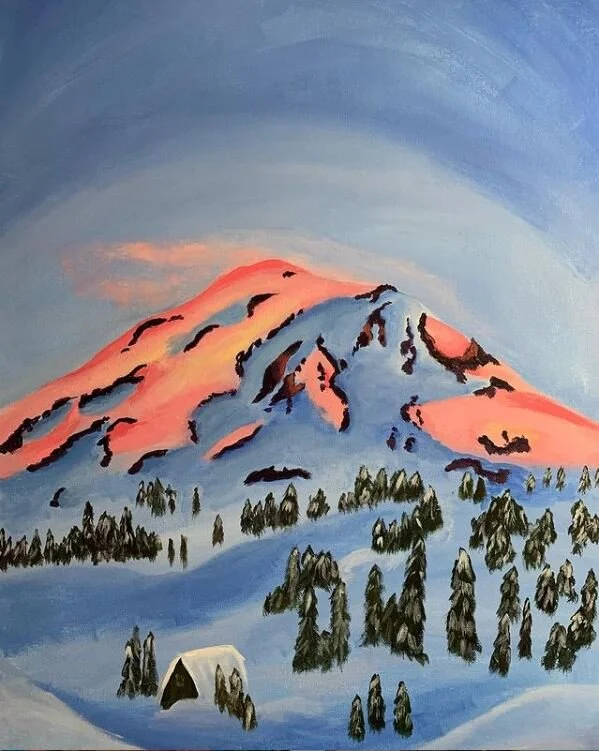
Here is the basics of what I got from this exercise. There are colors that I gravitate toward but more specifically I enjoy the contrast of colors. I enjoy when lines are created by color and and form apposed to actual line work. I am inspired by and enjoy art inspired by nature. There’s more there for sure but those were my biggest take aways. This didn’t necessarily teach me anything I didn’t already know but what it did show me is what I like and why. This inspired me to paint and create based on what I saw as my preferences to create my style. Here are a couple painting I did following this class.
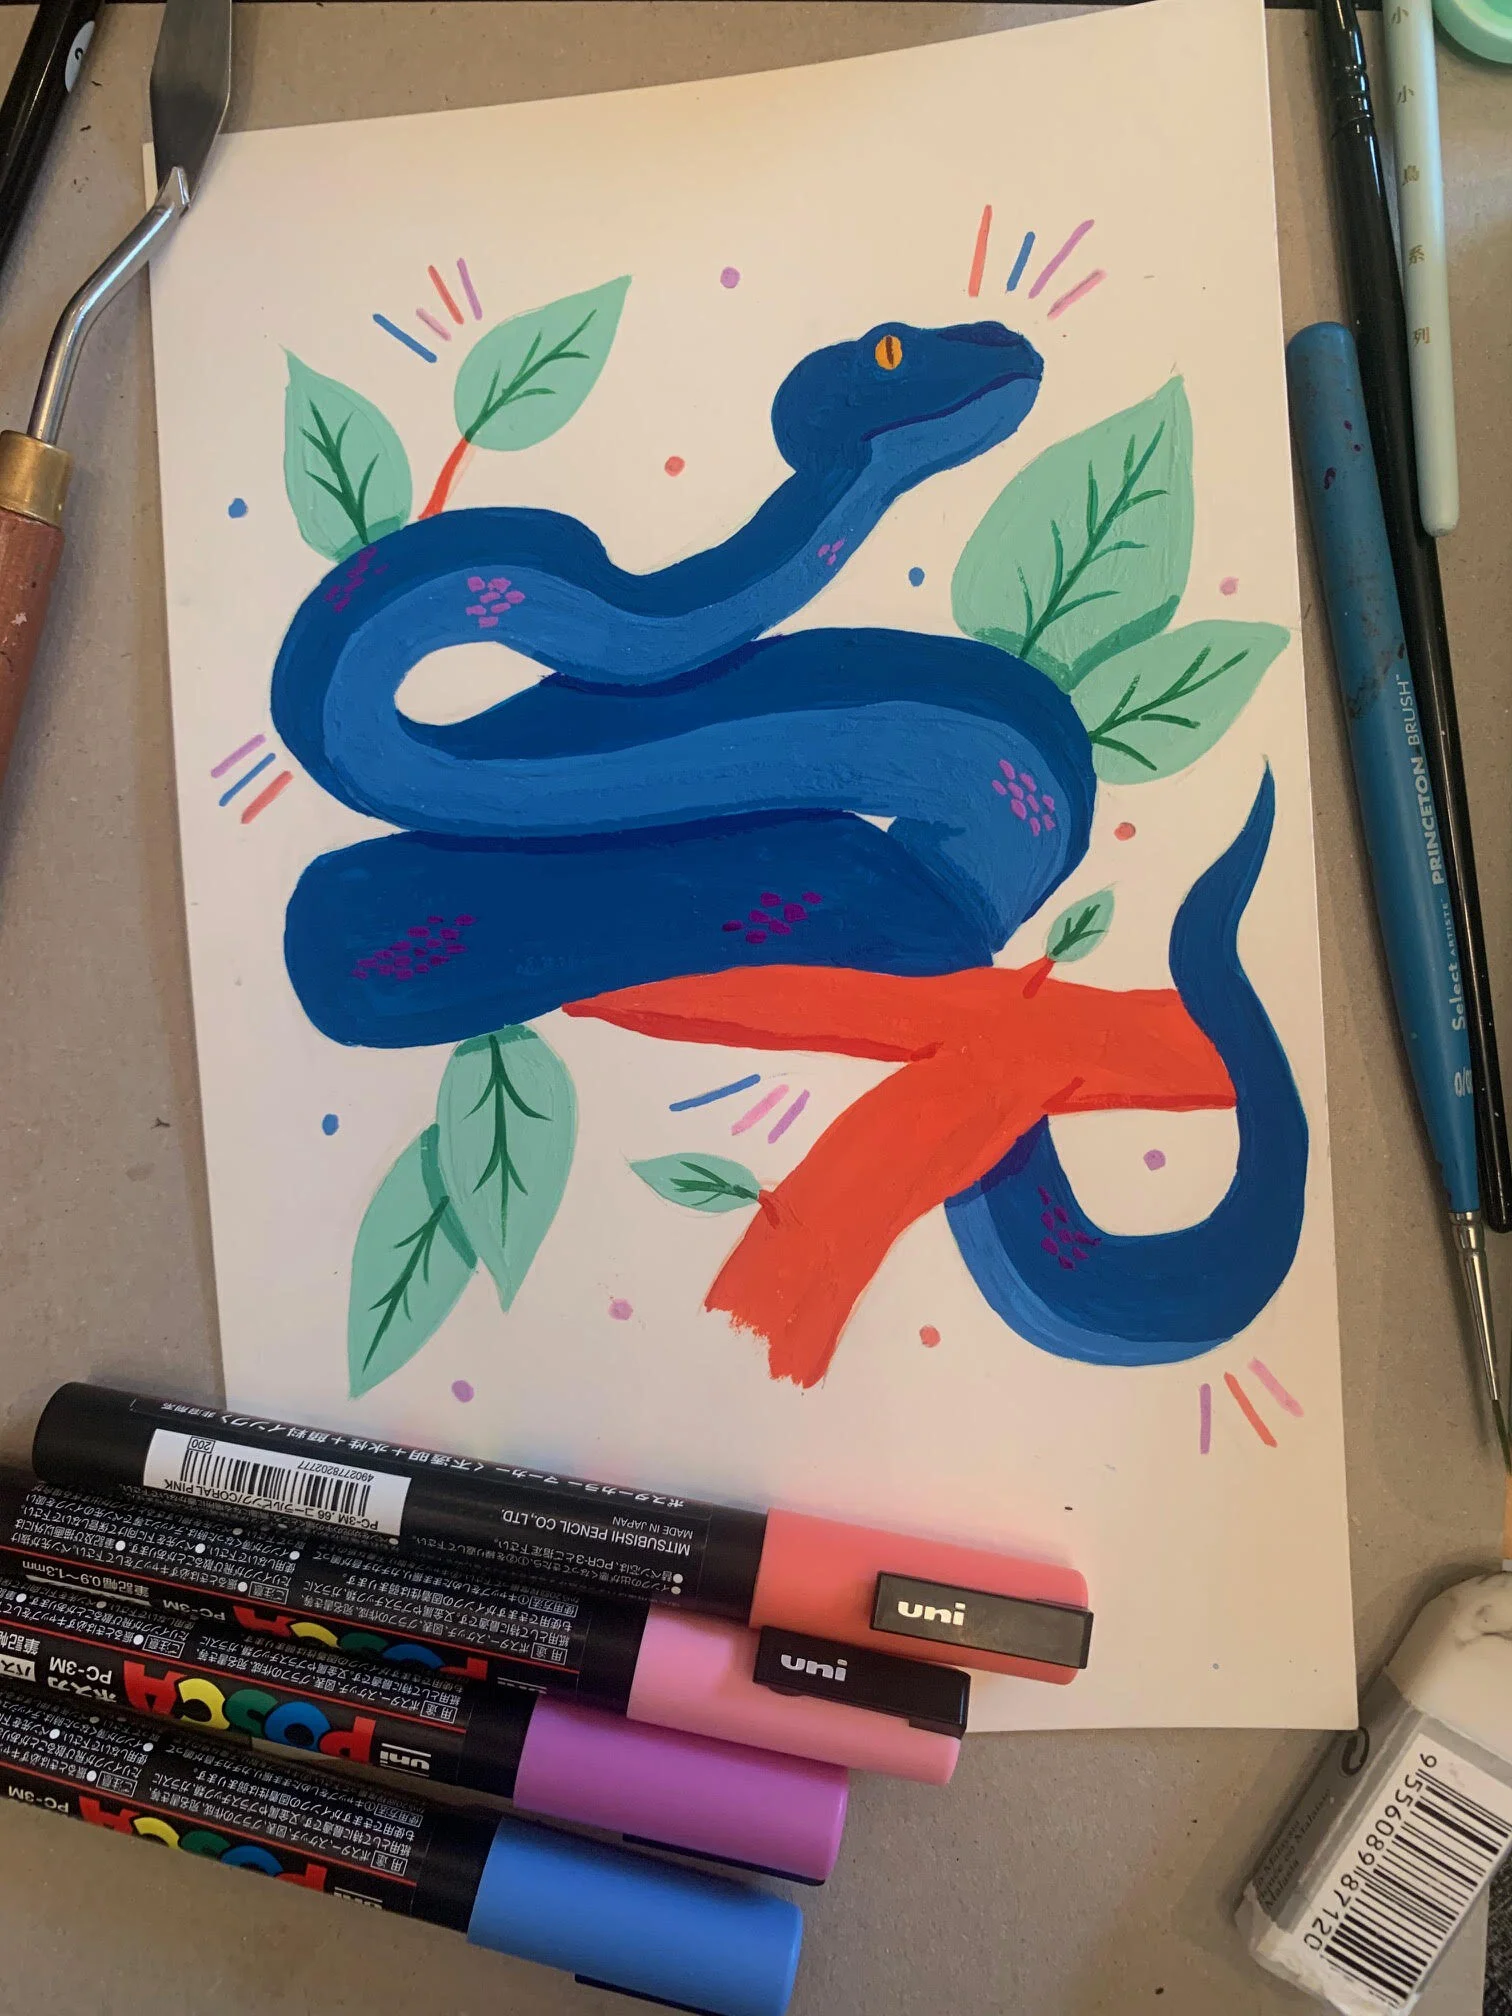
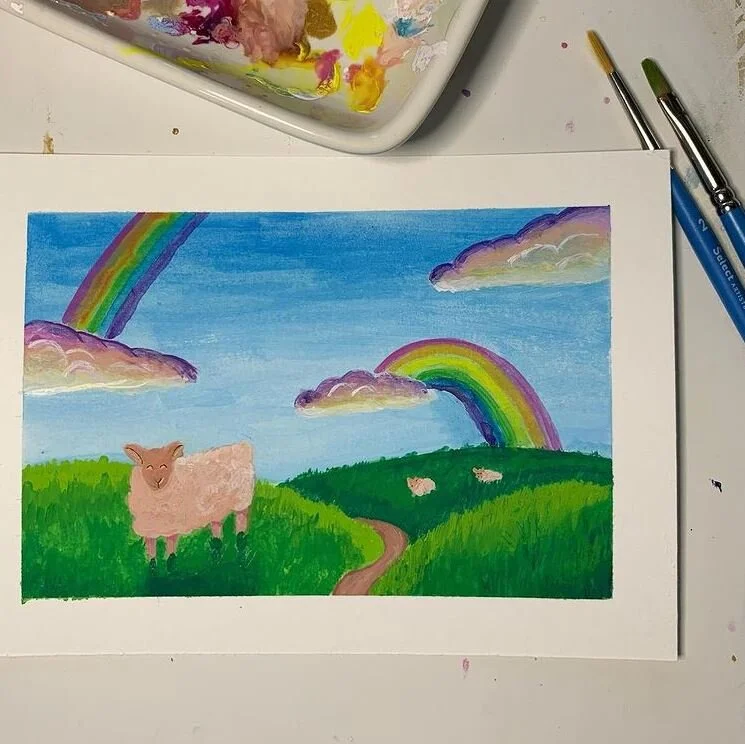
I feel like there is an apparent difference from where I started to what I was creating after the class. But as an artist today I can tell you they were all my style. My style was always there. If you are also trying to find your style its already there. This biggest difference from the pieces in the beginning to these pieces, is I wasn’t trying to create someone else style into my own. Its fantastic to have artist you like and enjoy. Its ok to feel like an artist is similar to you (as long as you are not copying) But to truly see your style figure out what it is you like and just create what you want. Use references that are not art ,like real life, still life, or nature instead of looking at other artists work. You’re style is there. No matter what you create — if you are the one creating it and you aren’t copying your style is already showing whether you see it or not. Before I “found” my style, friends would comment on my style and it was always a shock because I never saw it. A lack of consistency in your style doesn’t mean you don’t have one, it just means you are continuing to learn and grow and I promise its there hiding in plain sight. Here is work I am creating now.
With all of that said my biggest advice to finding your style it to keep making art. Your style is already there but the only way to allow yourself to see it, is by creating. If you need a refresh try the mood board like I did. You got this, I believe in you and your style. Best of luck growing, learning, and creating.
Happy painting,
Mickey
Originally When I thought about this blog post and painted for it, I wanted it to be some tips and tricks to painting with water color. This post has now become more of a what not do and how to correct mistakes. I know I learn better with visual aids and by trail and error. If you are new for watercolor and need some basic tips to guide you this post is for you
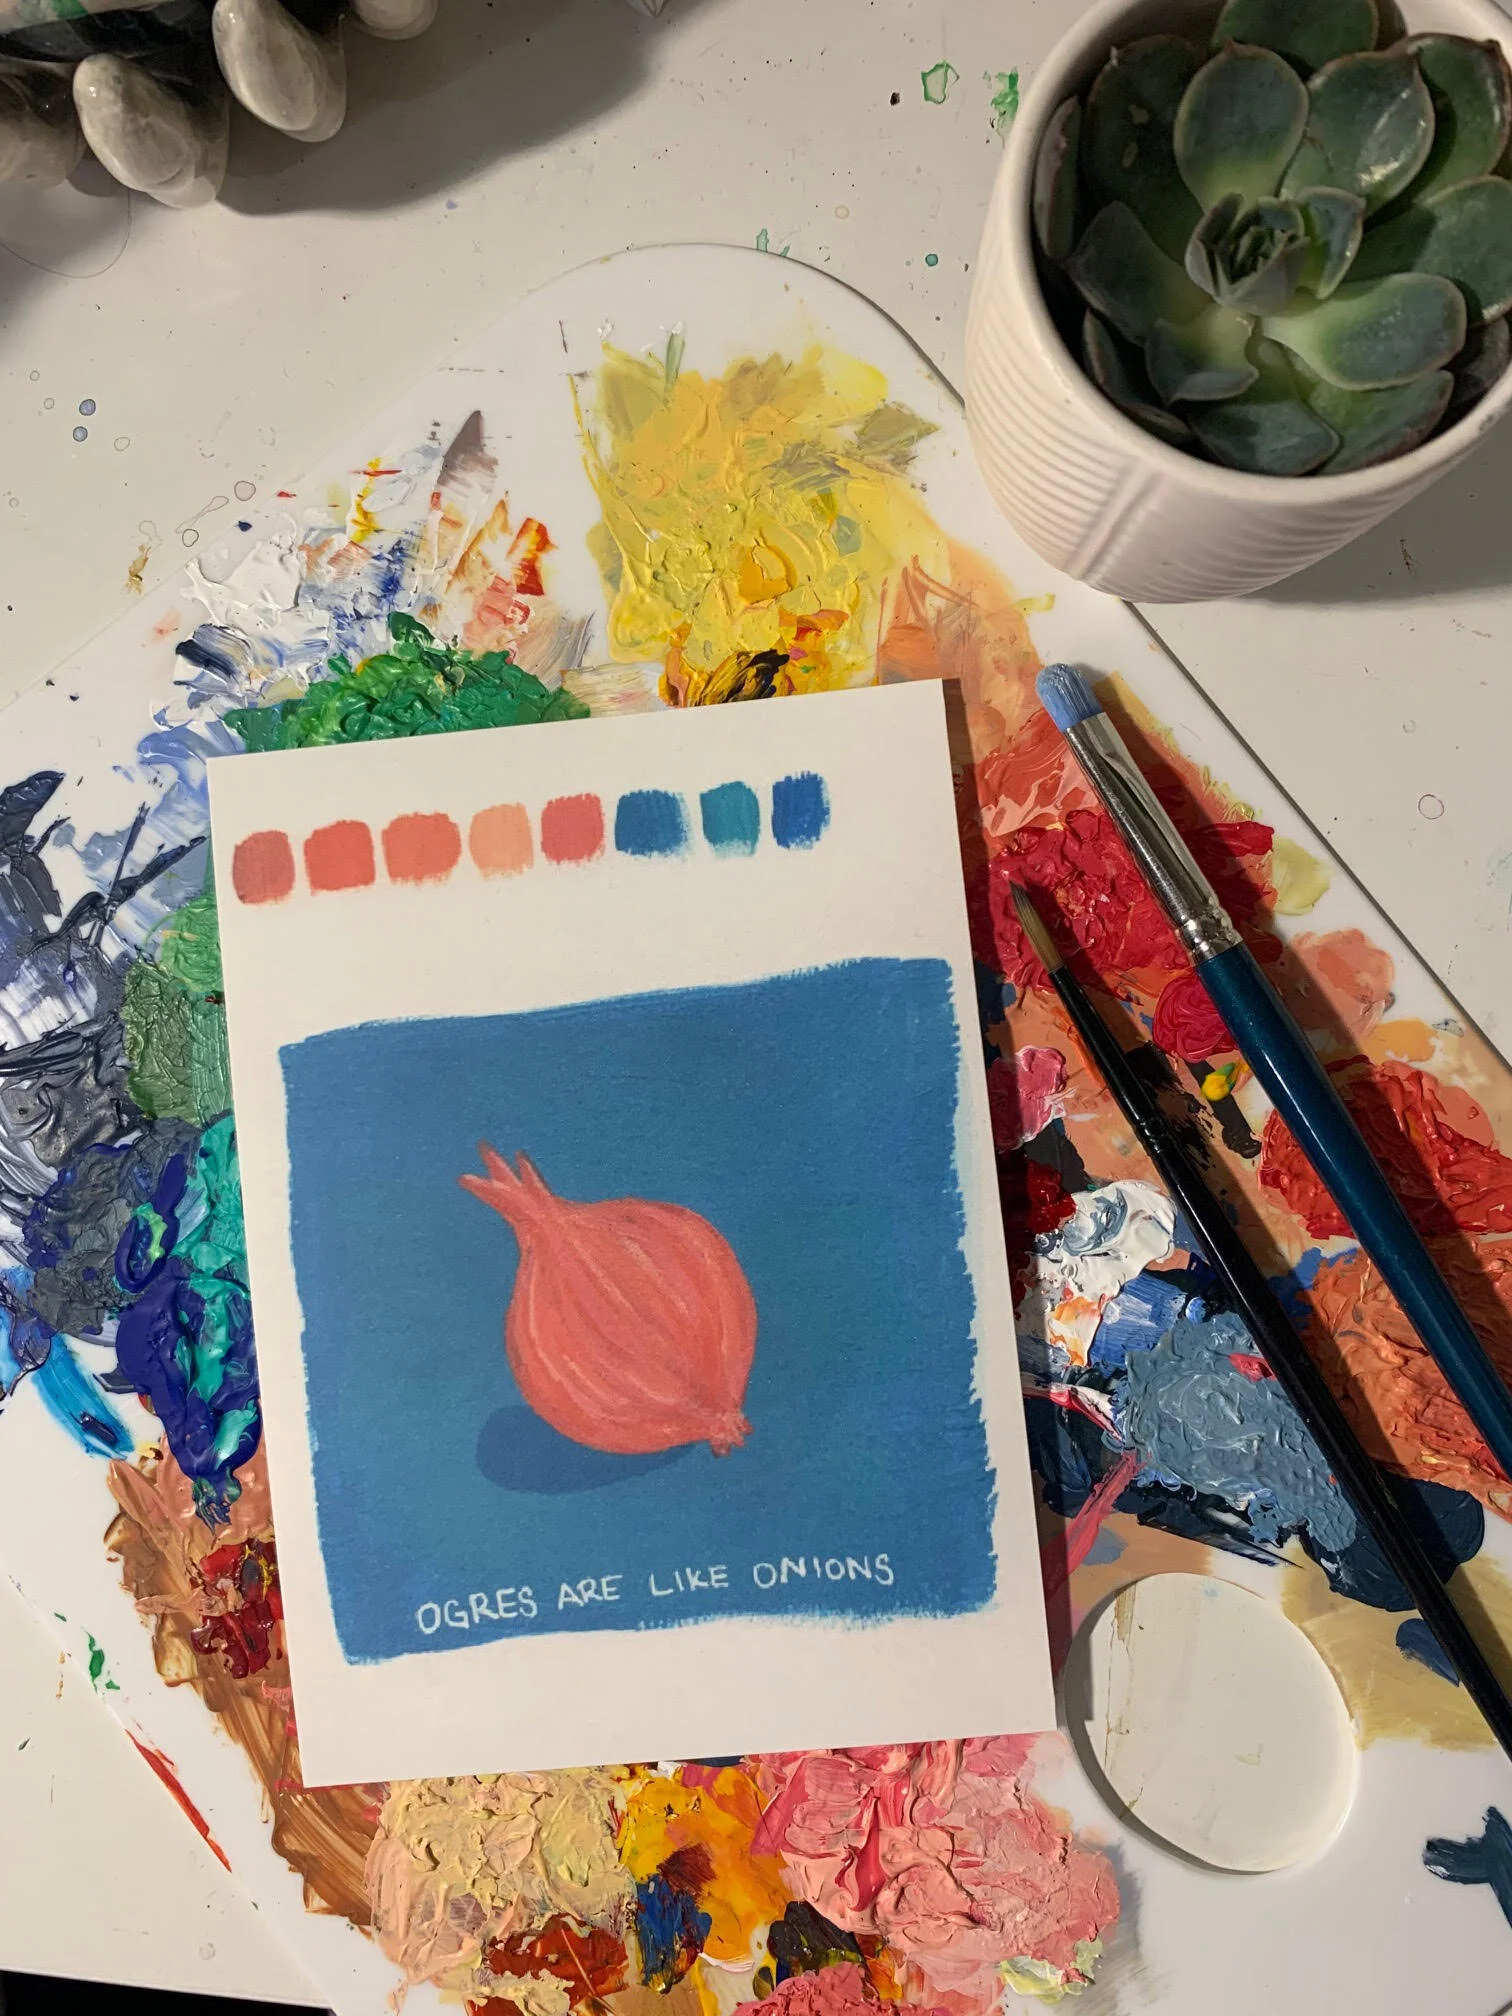
I consider myself a mixed media artist. I love experimenting with new supplies. My favorite supplies are always dictated by whatever I enjoy a painting the most at the time. When I liked painting more surreal paintings I really enjoyed acrylic. When I was going more toward character and cartoon like drawings I loved digital. When I was painting a lot of simple animal and floral paintings I enjoyed watercolor. Currently I’ve really enjoyed playing with colors in landscapes and I really like using gouache for that.
Coming back to a medium you really enjoyed sometimes comes with a learning curve. Not that you don’t know how to use it or forgot but when you get used to one medium and switch gears it may take some practice to readjust. That is exactly what happened here. I had intentions for this blog post for tips and found myself needing tips for for myself to relearn and readjust to a medium I hadn’t been using much.
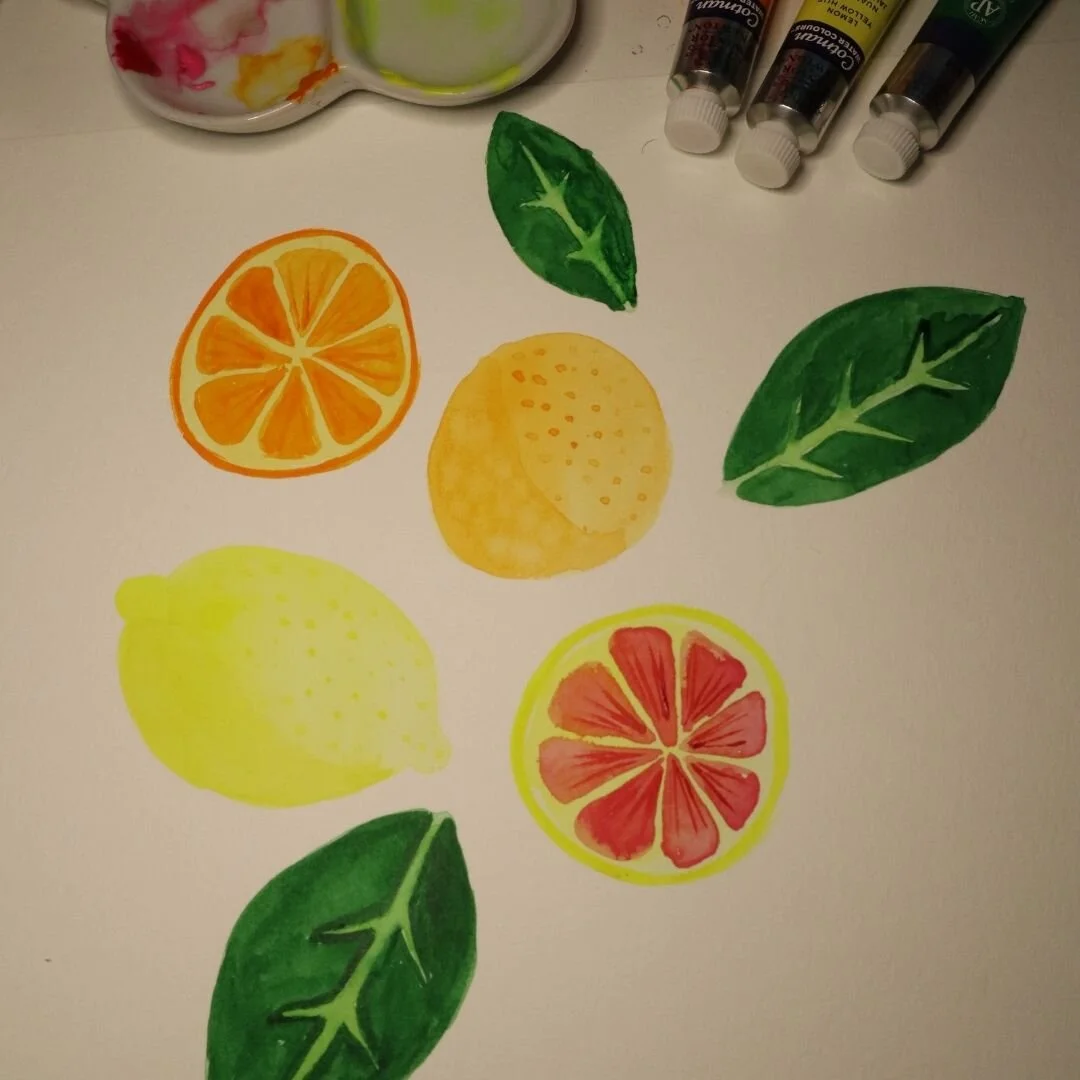
Lets start with supplies and where I first failed. So with watercolors you need paper that can handle watercolor which essential means, you need paper that can handle a lot of water. If you don’t have paper that can handle this the piece won’t turn out how you want it especially if you are using a technique that requires more water than others.
Lets talk about watercolor techniques. There is wet on wet, wet on dry, dry on dry, and more somehow. These techniques refer to how wet or dry the paint and paper are. For example, wet on wet refers to wetting the paper first and applying watered down paint. Its often used for background or filling a large area. What is confusing about these techniques is the use of the word dry. Watercolor paint is water activated so it is never really dry. When these techniques say dry they mean relatively less water. The drier the brush or paint is the more pigmentation you’re going to get because like in most cases water dilutes the pigment.
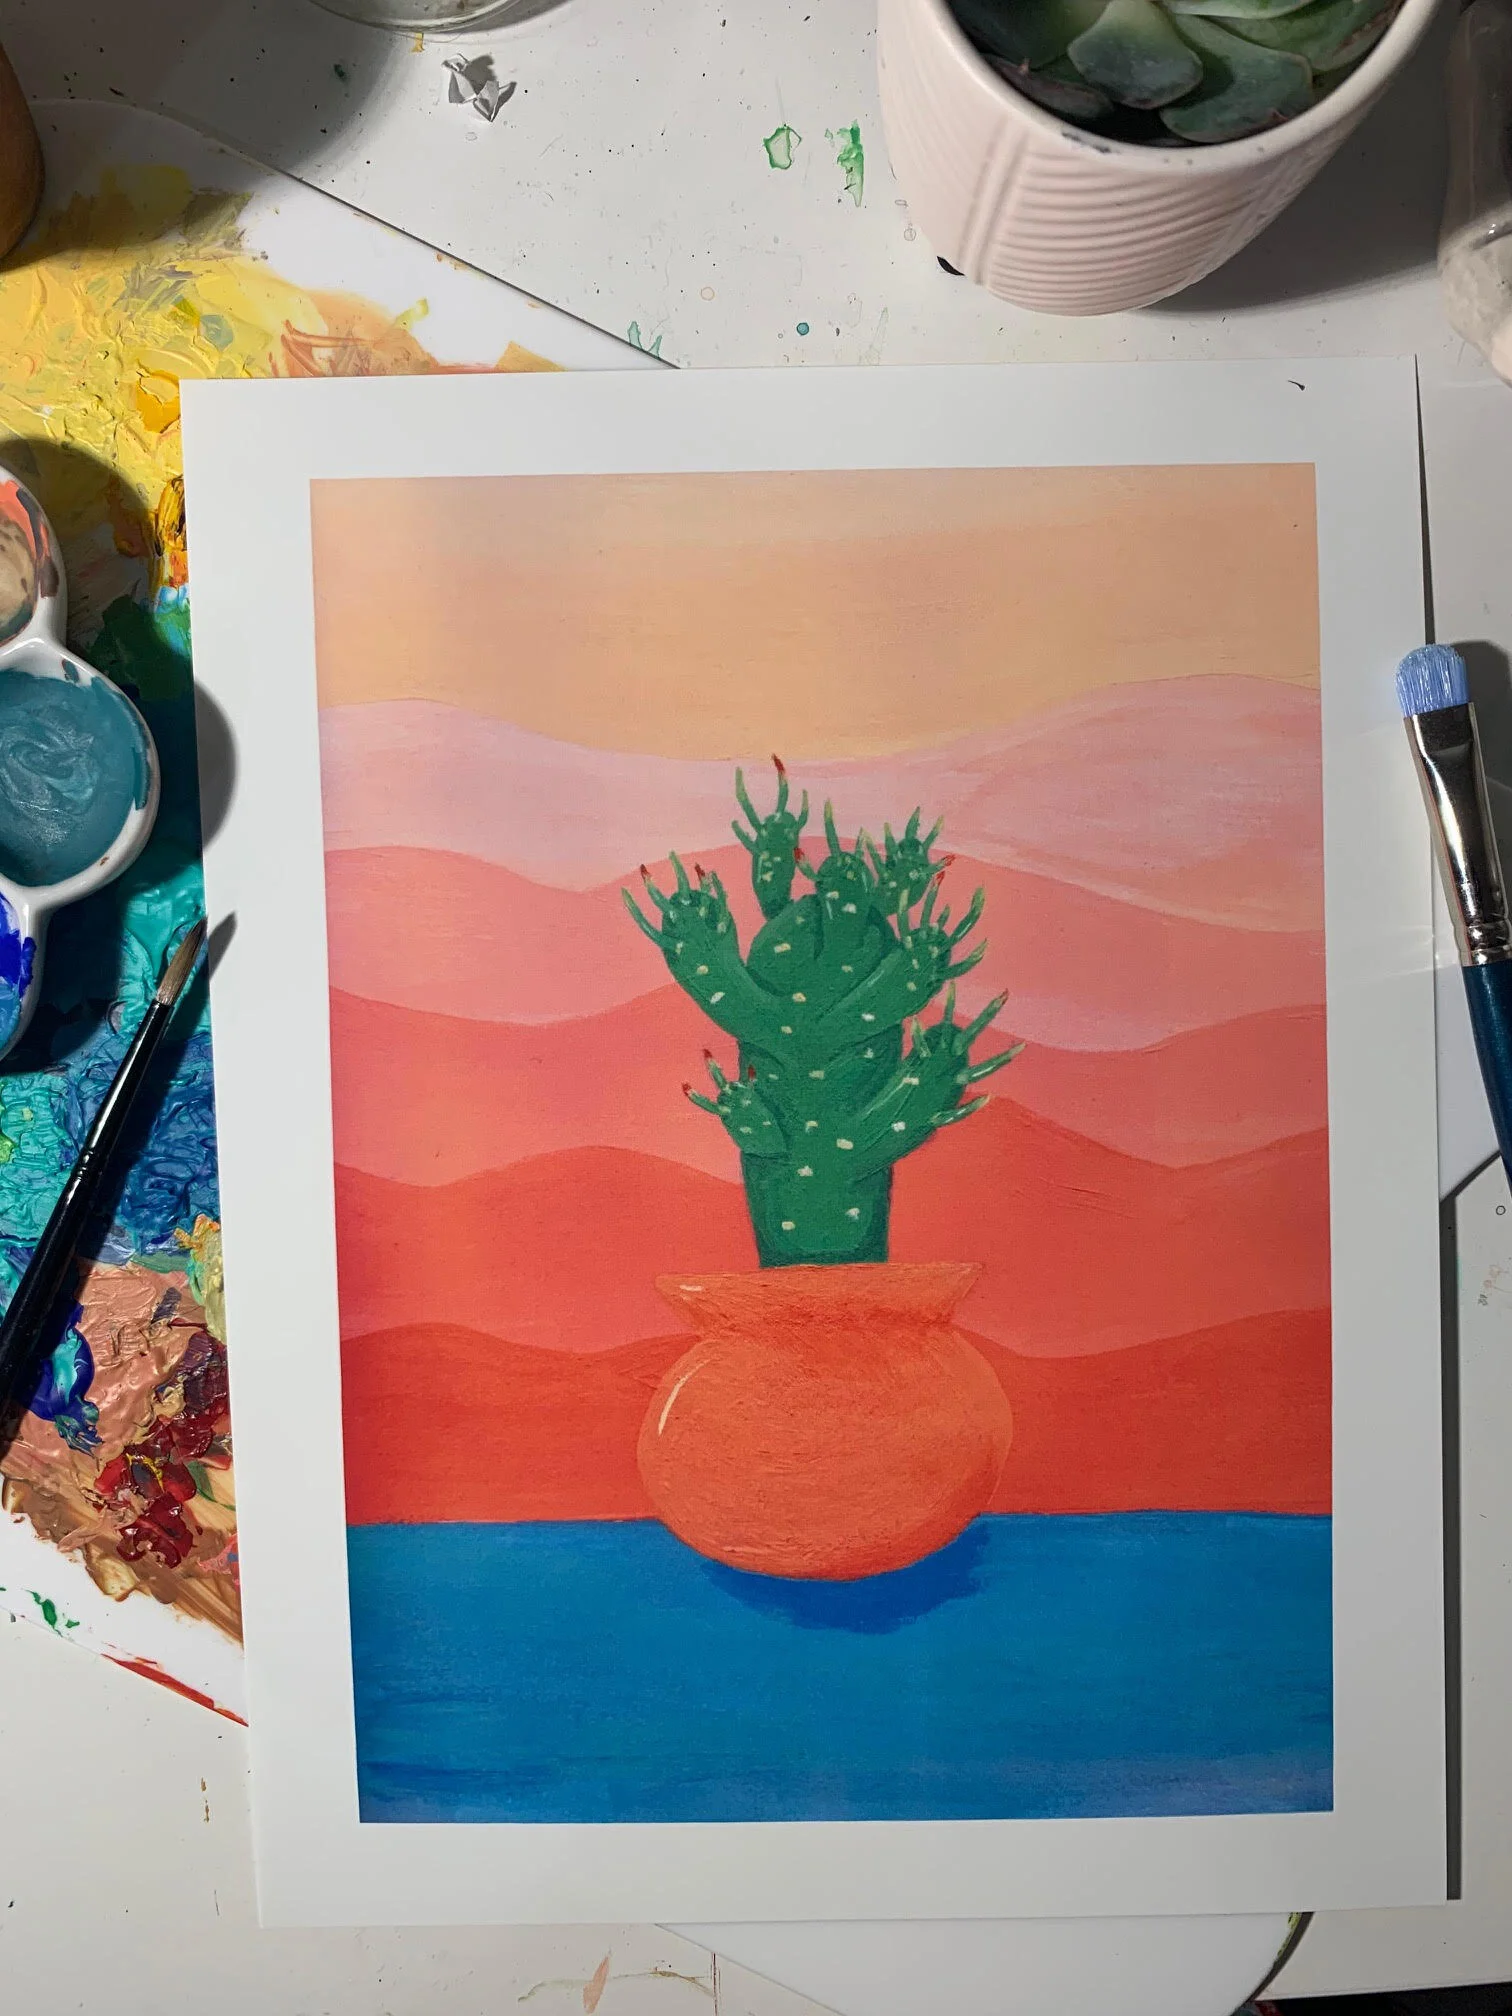
So I went on to try to demonstrate these techniques and quickly realized I was not doing these techniques justice. What went wrong? The cactus on the left I was using paper that couldn’t handle the amount of water I was using. I also used way more water than necessary, to both wet the paper and apply wet paint. On the right side I tried to use a dry technique but it ended up a little more wet than dry.
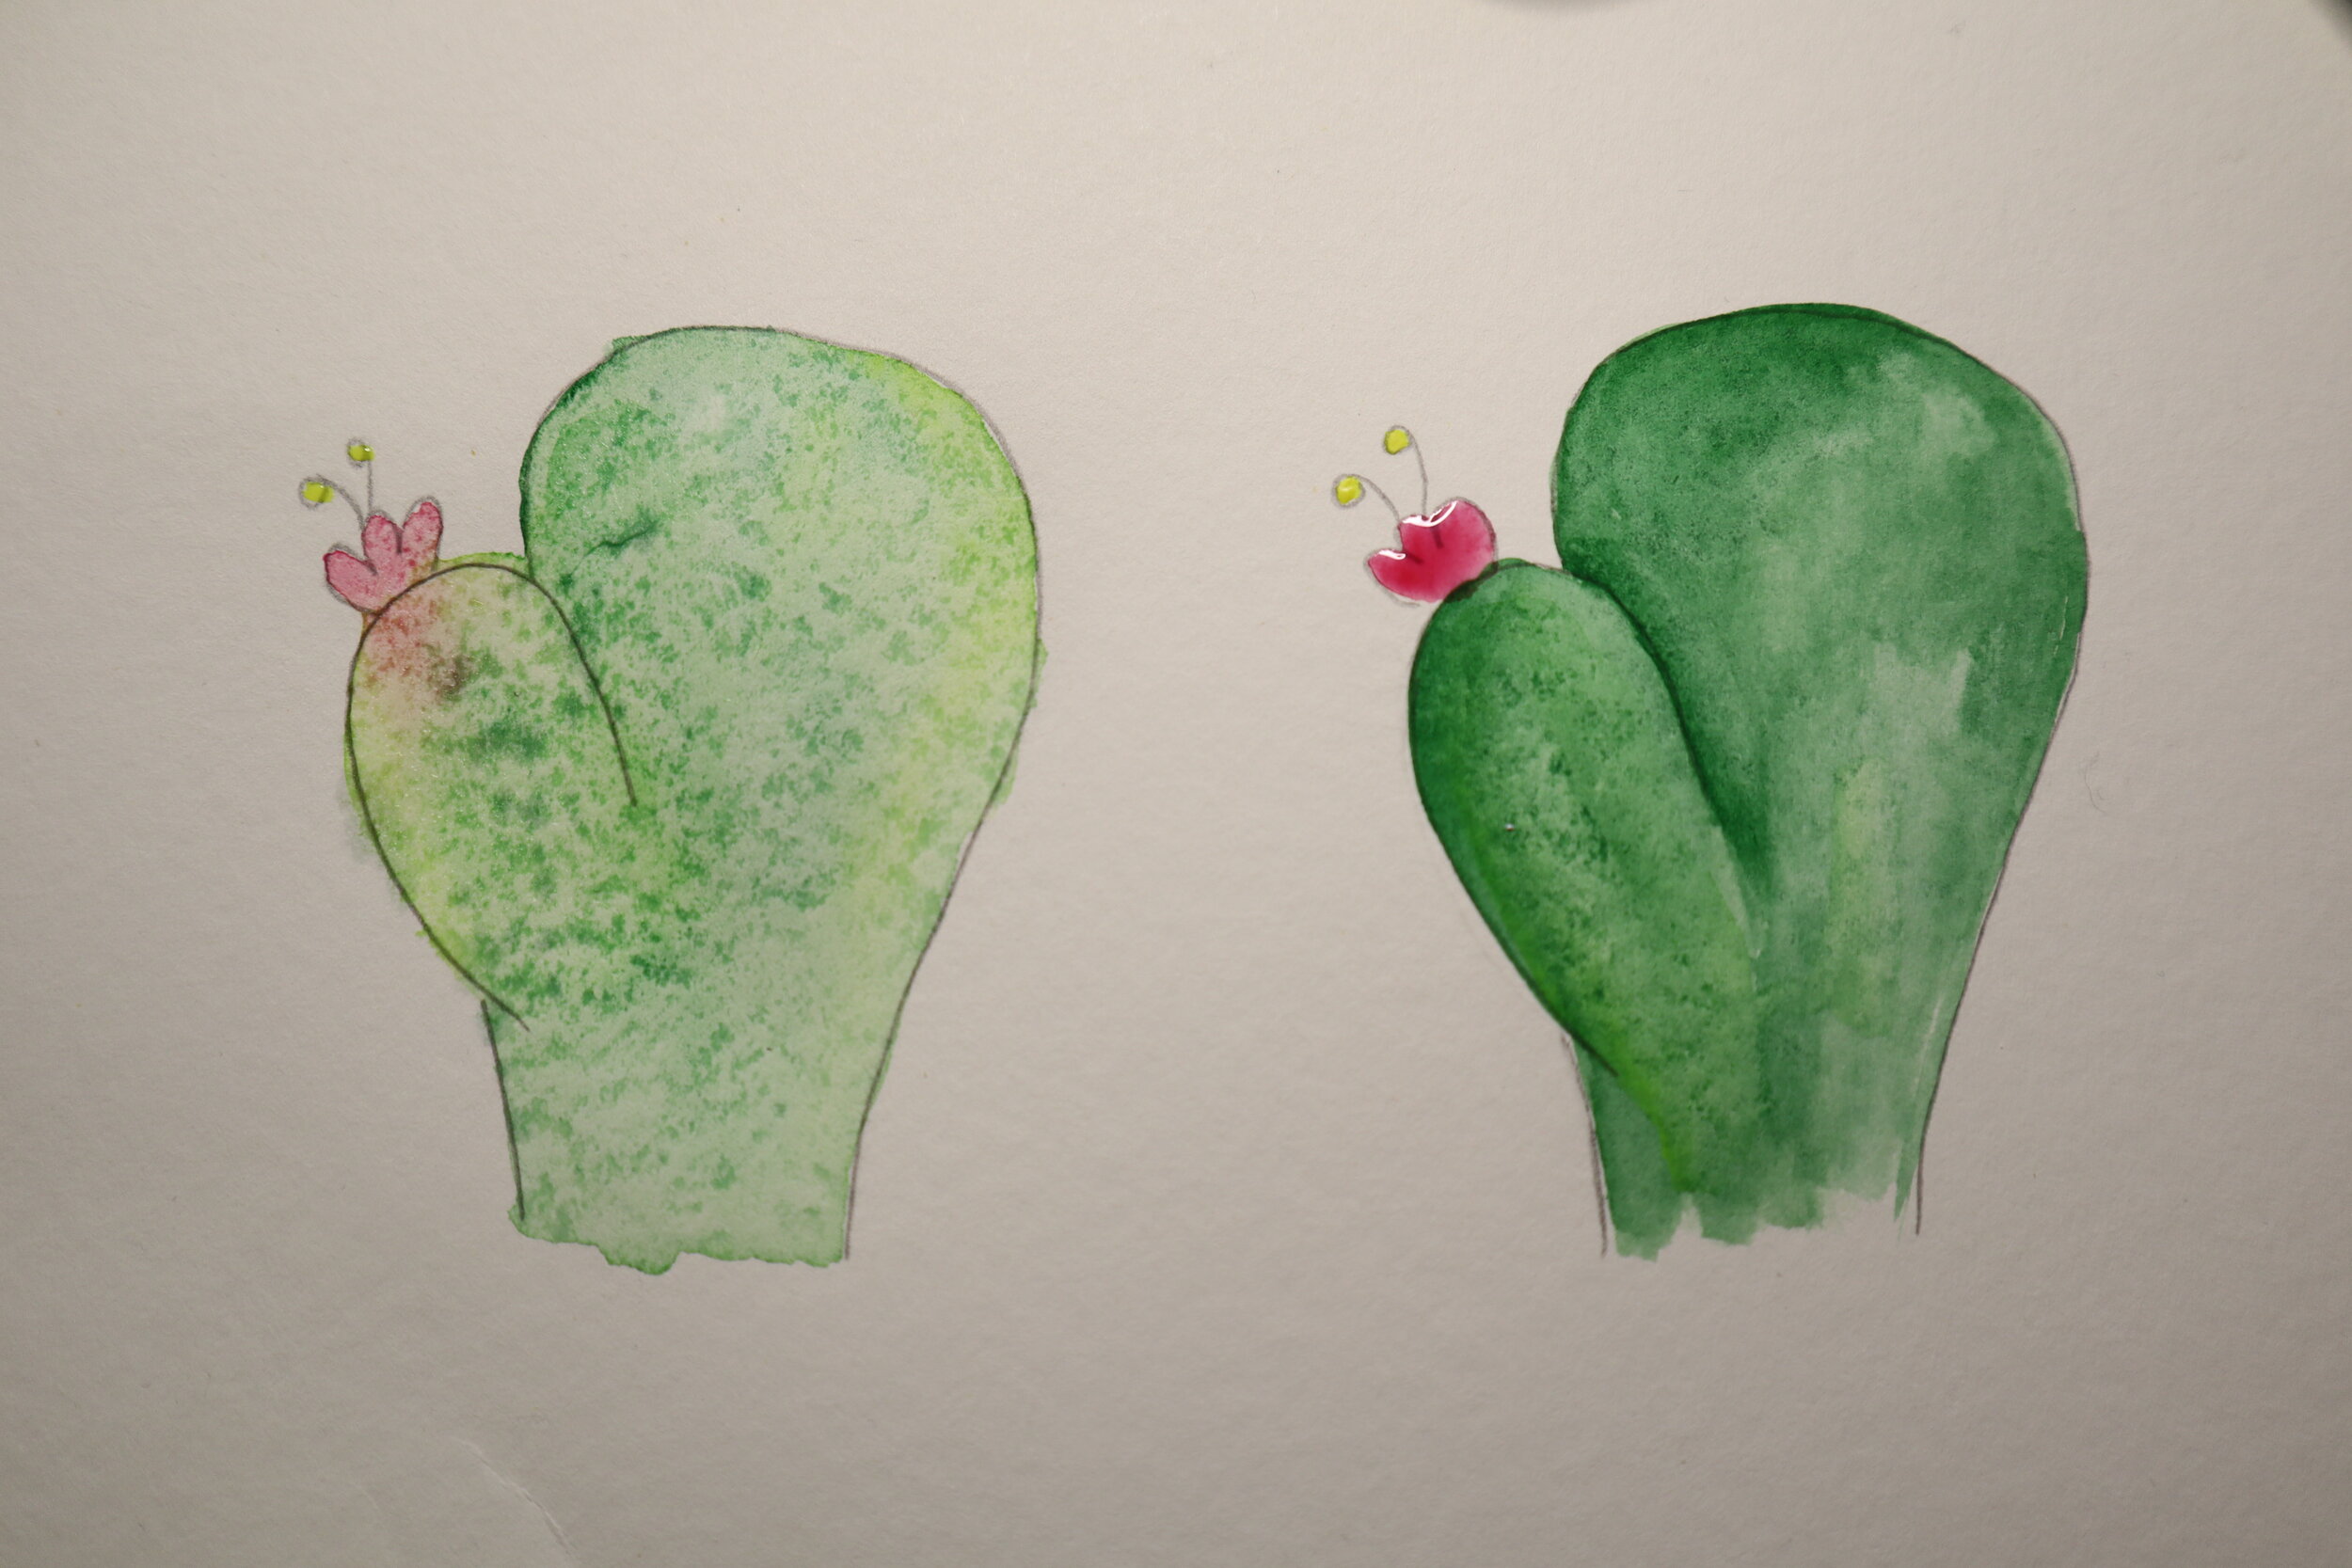
Next I tried to demonstrated the use of dry techniques to layer to create shading and line work and still continued to make errors. On the left side I didn’t give the wet technique the appropriate amount of time to dry before introducing a new color and paint. The shadows ended up being way darker than I wanted and the highlight is almost none existent due to trying to water down the paint and fix what I had done. Instead of being patient and allowing the painting to dry I ended up added even more water to a piece/paper that couldn’t handle it. On the right side I skipped to outer line work to try to avoid more mistakes and just added spikes using the dry on dry technique.
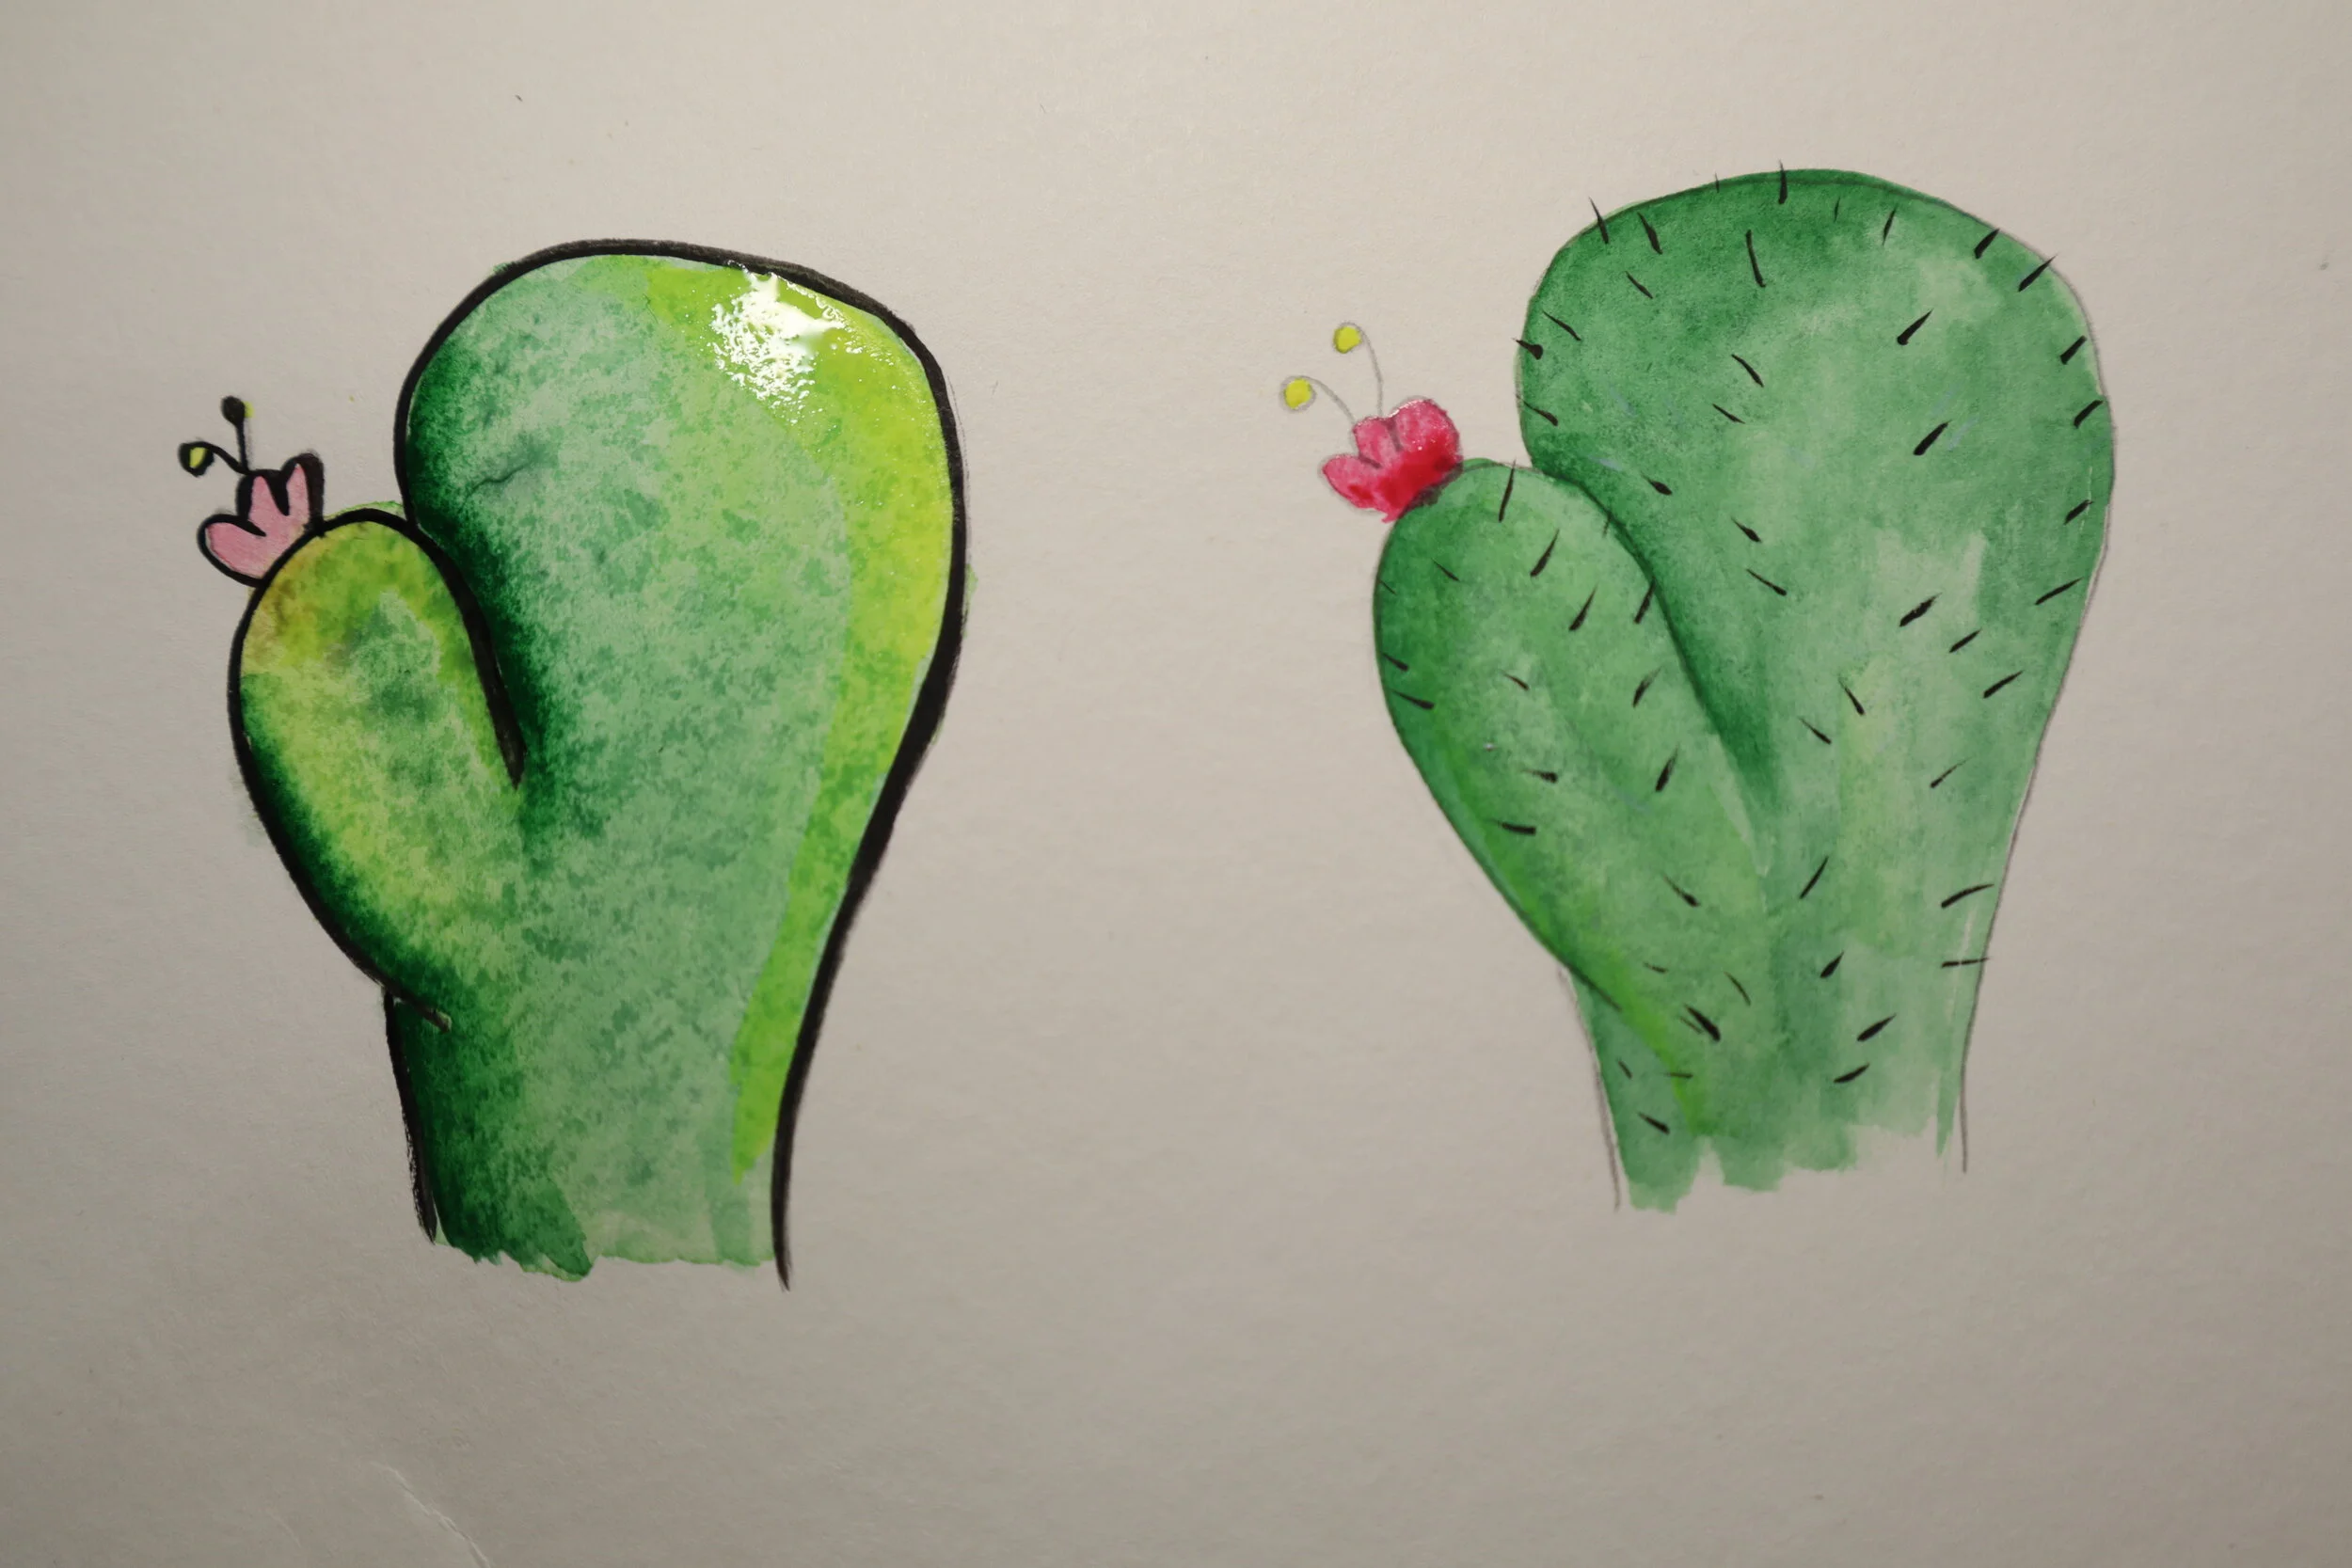
So in order to make up for this messy water color I decided to scrape the cactuses and start fresh by going to absolute basics of watercolor. I simplified what I was doing without worrying about a demonstration. I used less water and was patient with myself and the piece.
Here is a real break down of techniques and how I used them to create something was happy with:
First I used true watercolor paper. This makes big difference on how the pigment looked and dried. No more splotchy looking background.
I used the wet on wet method to create a base for everything. Instead of overdoing it with the water I laid a just a light base coat of water and didn’t over saturate the paint before painting.
I was patient this time and allowed the paint to dry between layering.
I used wet on wet to do base layers then dry techniques once it was dry to create the watercolor effect I was looking for.
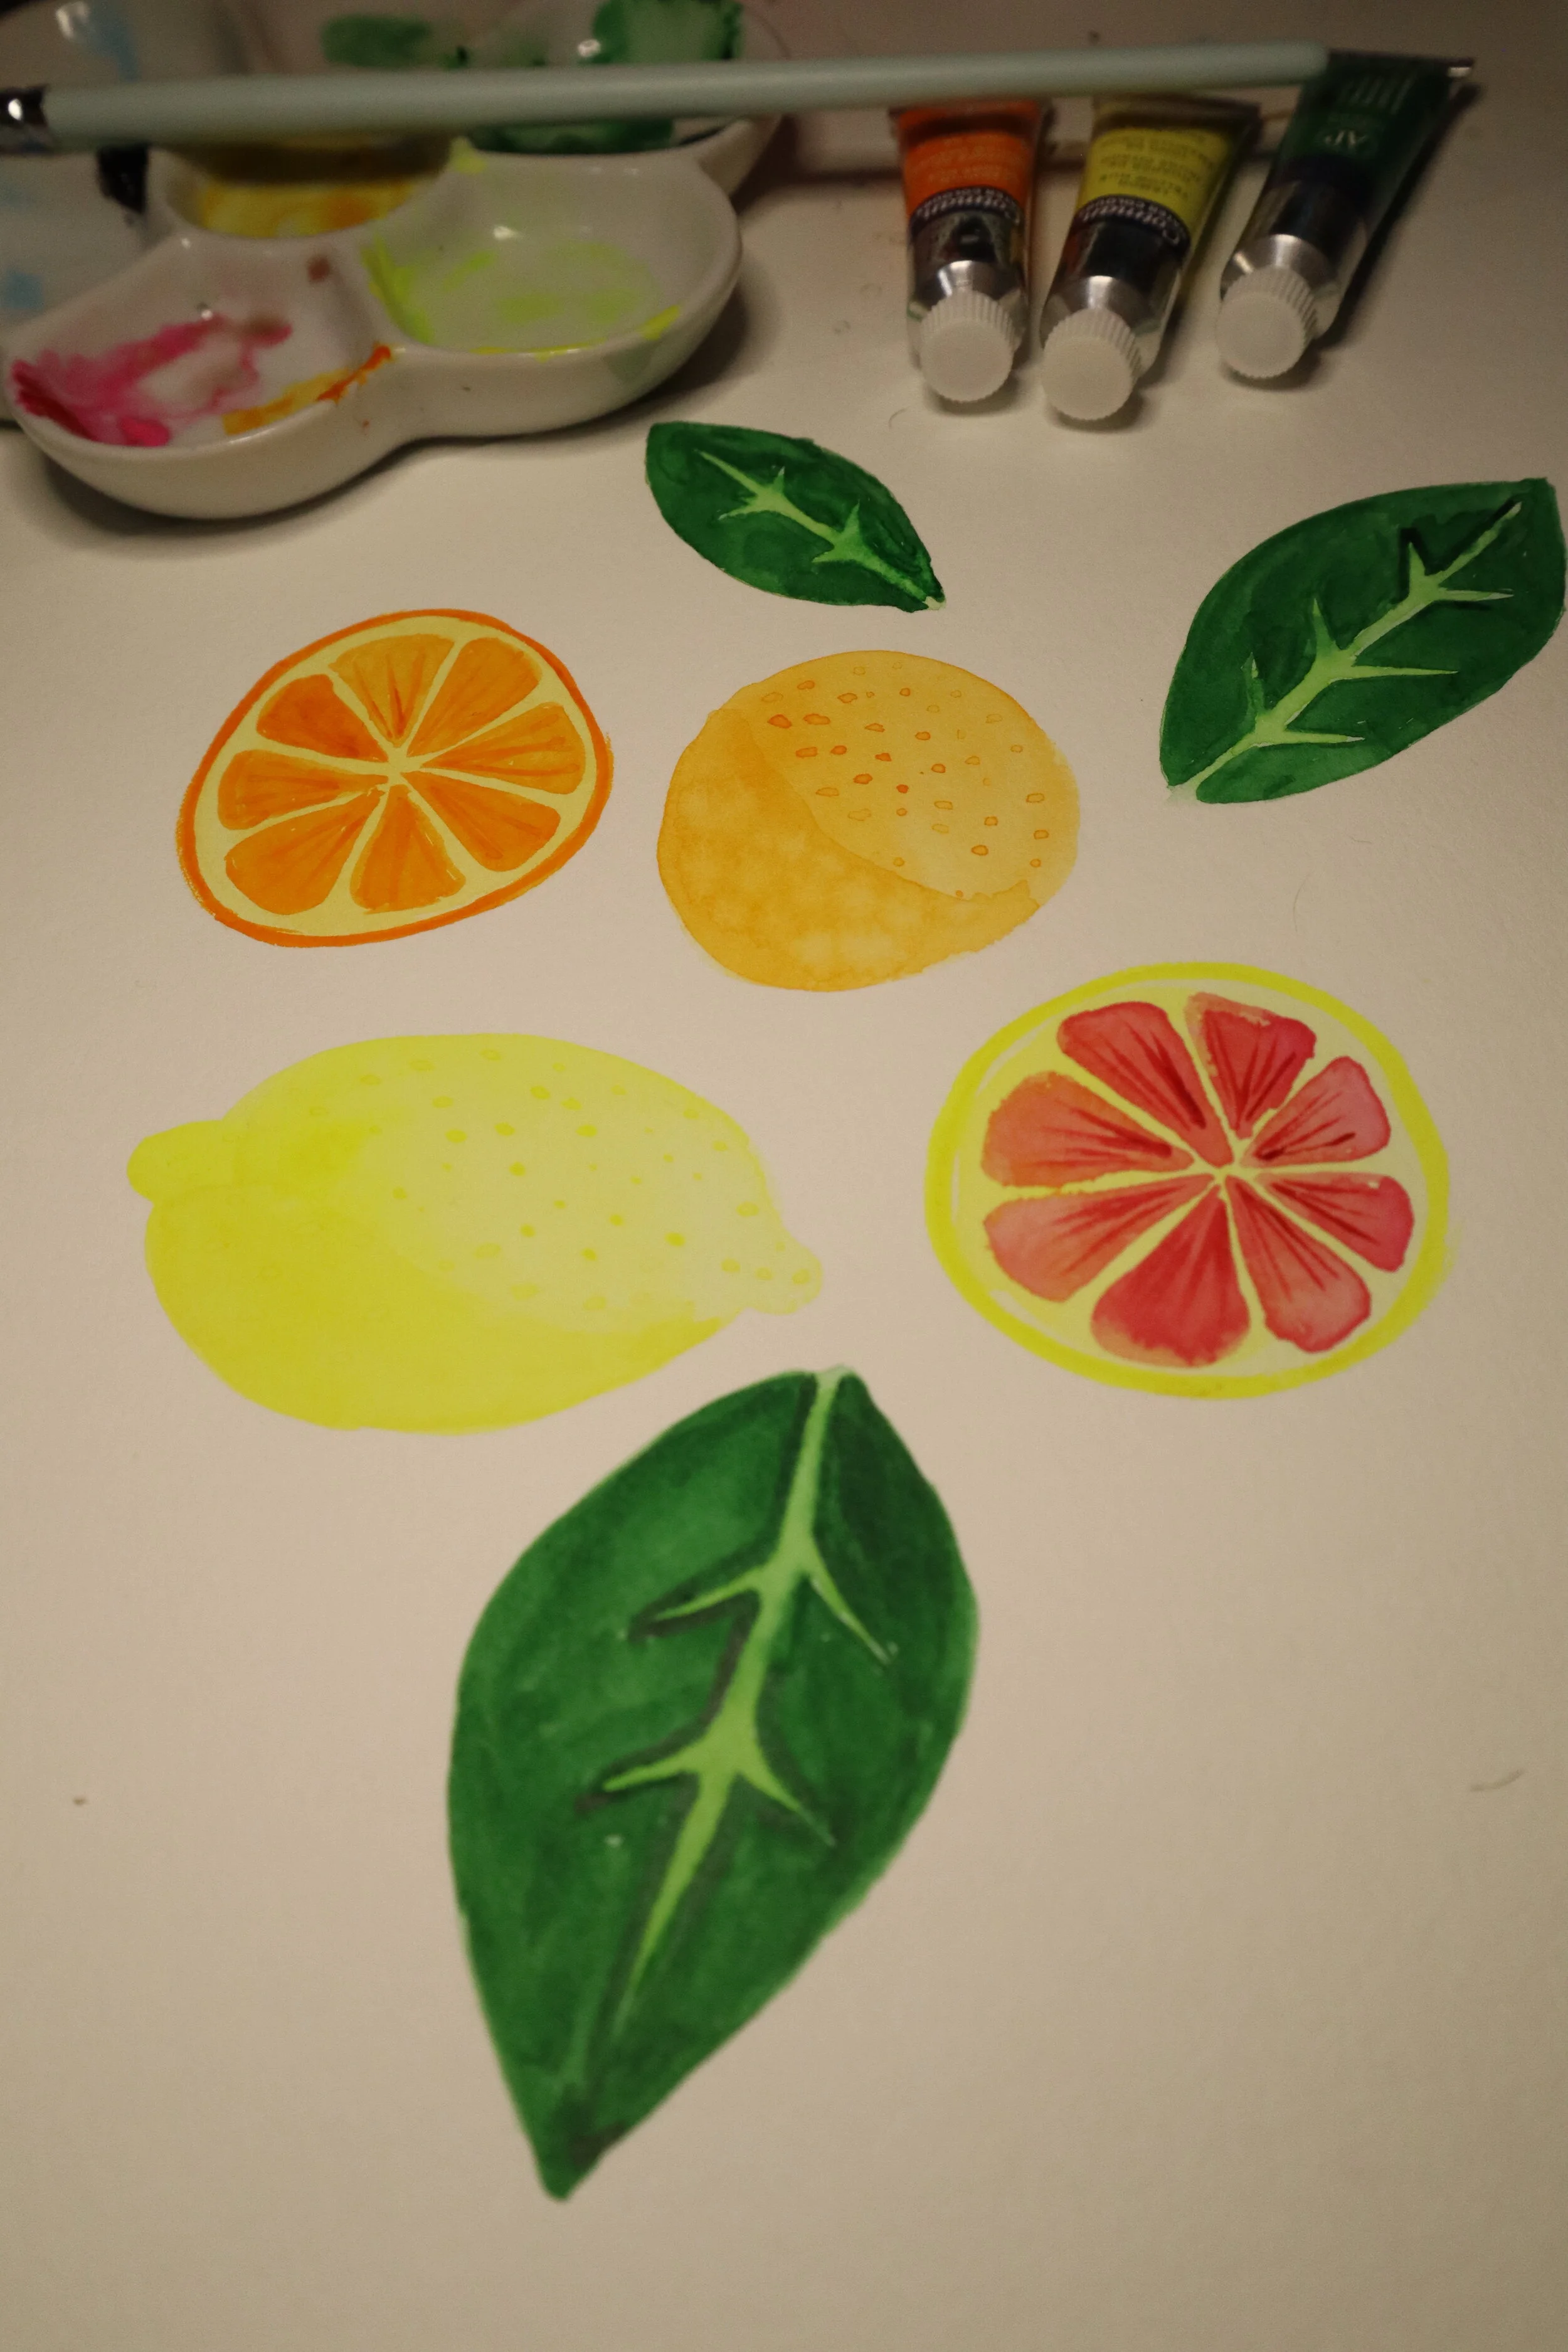
Im much happier with how this went. The cactus was a nice practice and reminded me of the techniques by doing them wrong. Be easy on yourself when you are learning or getting back into the grove of something. “Perfection is the enemy of progess”
Happy Painting,
Mickey
I got my first ZenPop box last month and I opened it on stream! If you dont know what ZenPop is, its a Japanese stationary subscription box. I was really happy with what I got and the experience of it all. I wanted to do a quick blog post about it and my fav items and what I thought about the box as a whole. If you are wondering if this is something you’d like to try maybe this post will help.
I plan on getting this box and other art related monthly subscription boxes and I want to share with you my thoughts outside of streaming the unboxing. I want to be able to share here how Ive used or liked everything after having my new items.
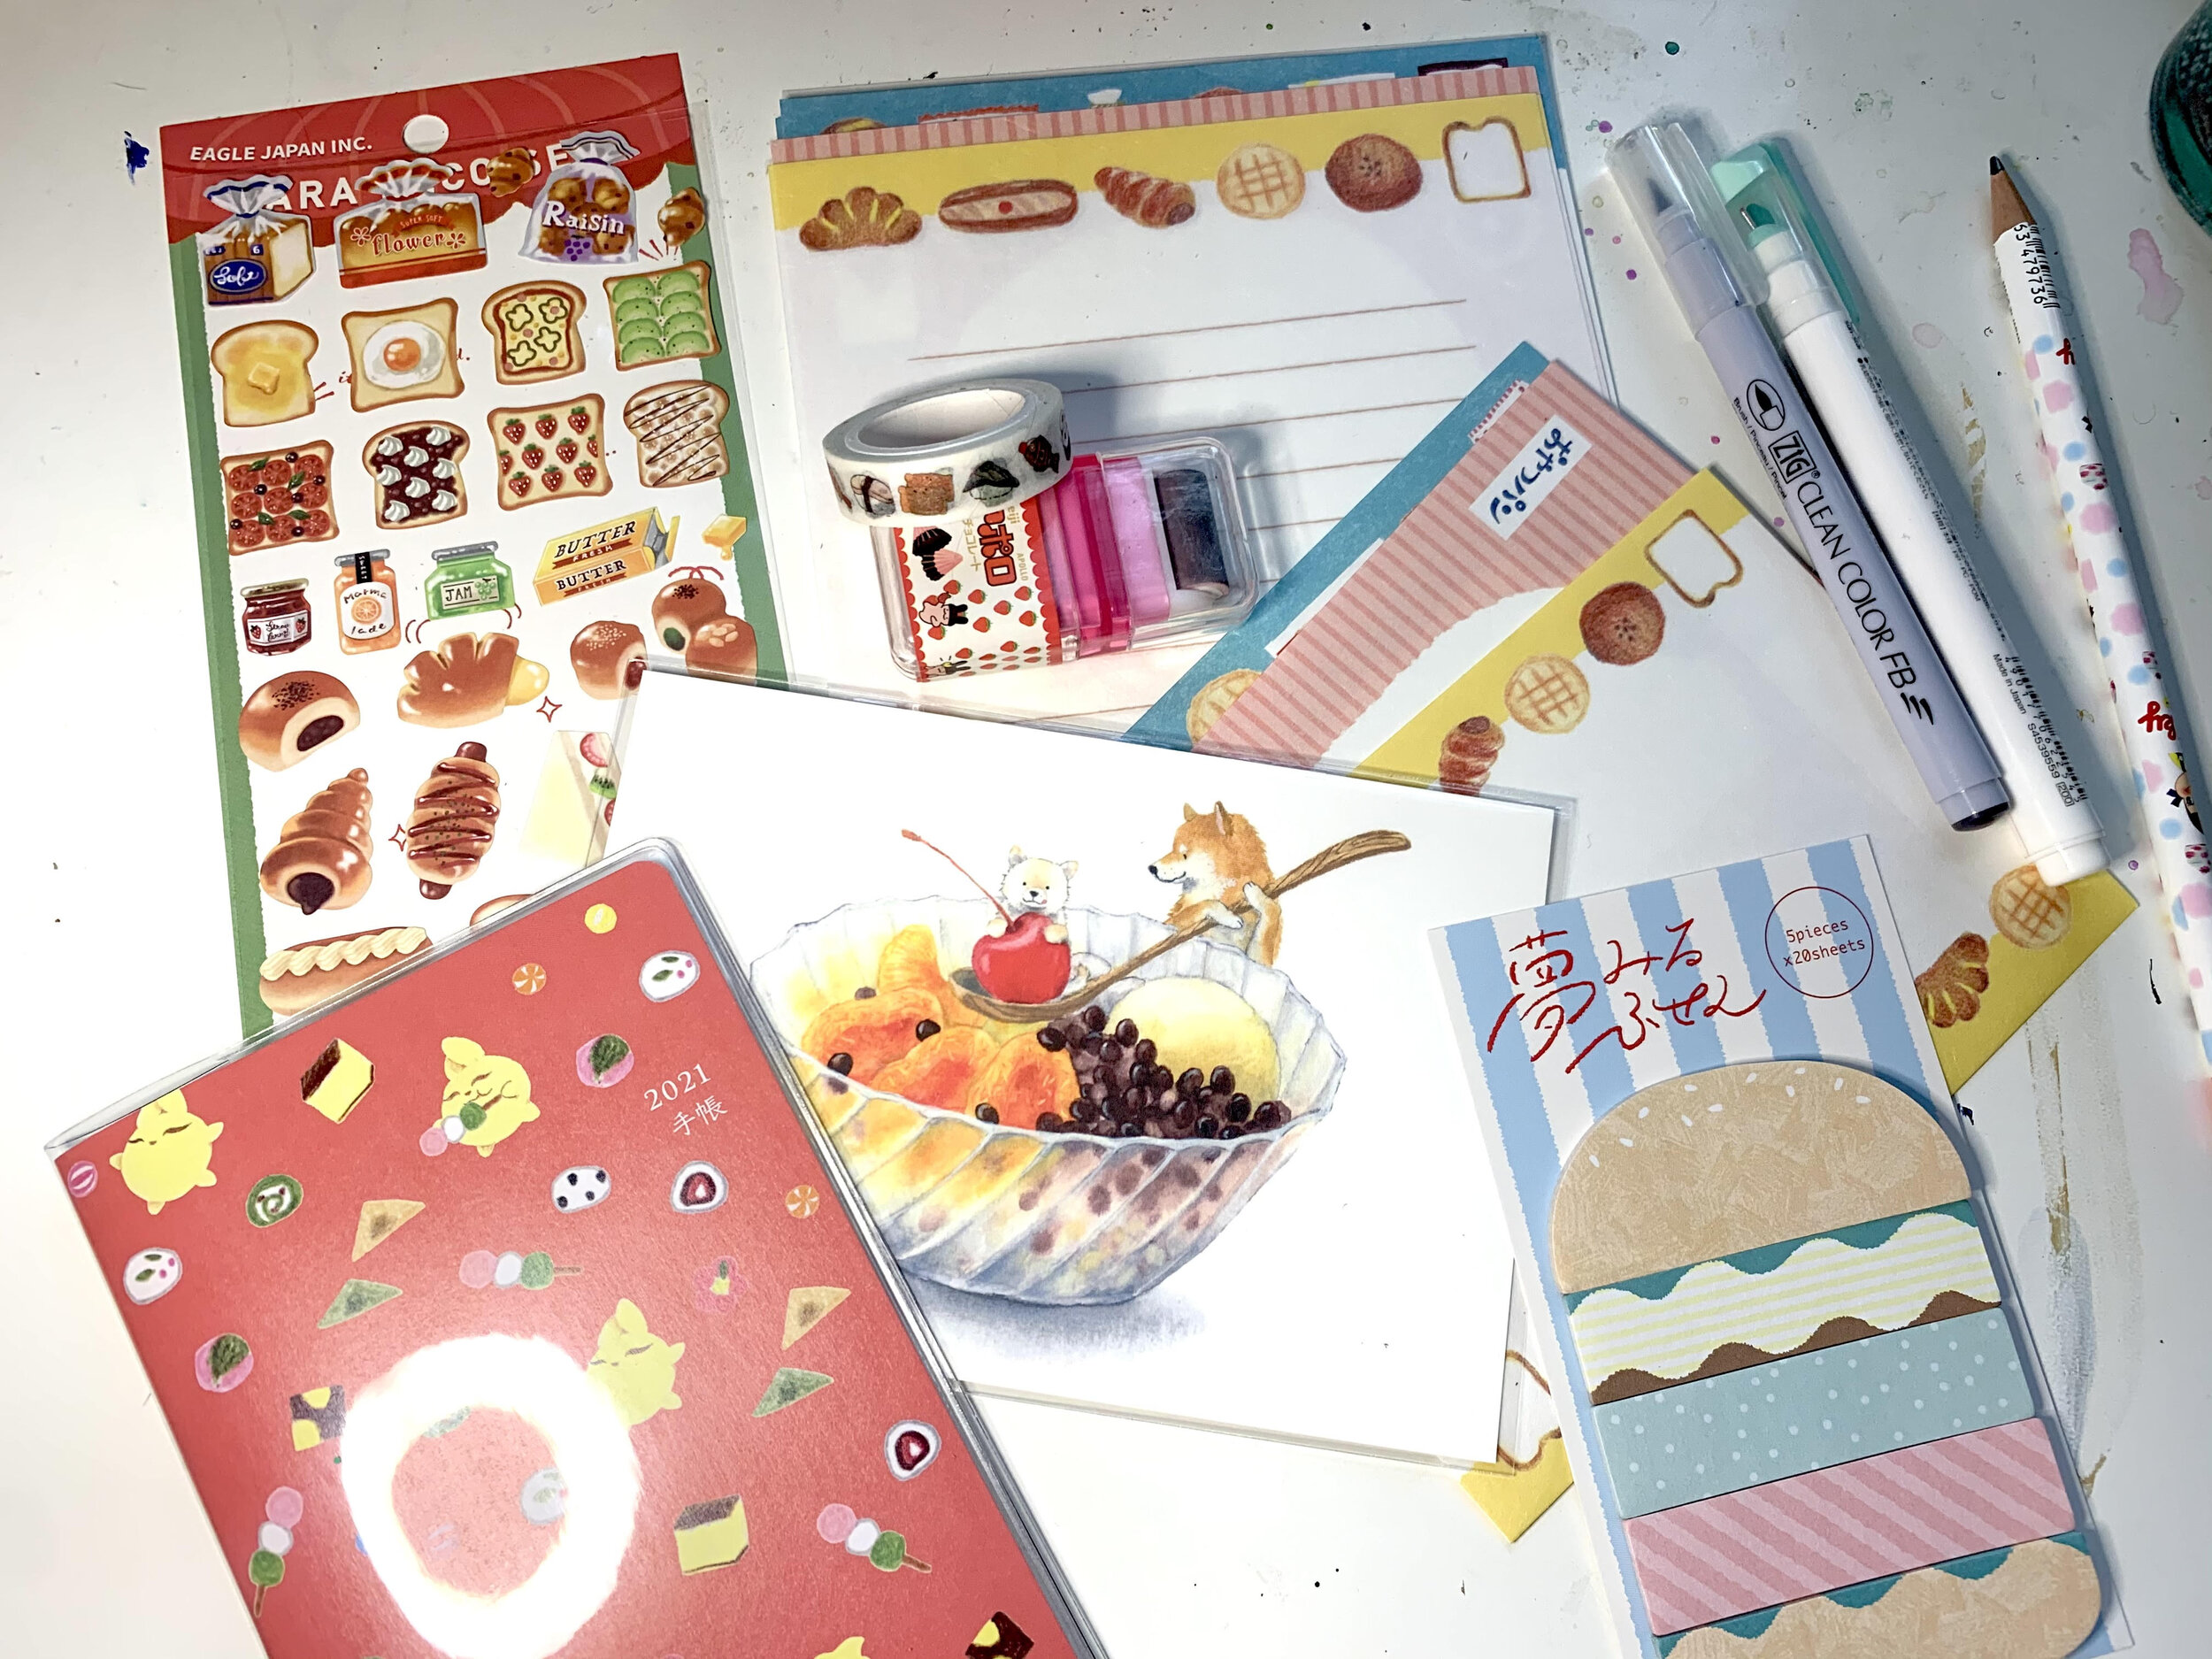
Above is everything I received in my March ZenPop Box . Everything was super cute and food themed. It was like Christmas all over again opening everything. Sharing it on stream I think made it a special experience. If you want to watch more unboxing and art streams check out my twitch here.
Some of the more unique items were probably my favorite items. The eraser was really unique, and what I was most excited about. ZenPop gives you the theme each month and some hints as to what’s in the box. I knew I was getting some kind of interesting eraser but I wasn’t sure how it was going to work or look. I use this eraser when I need something similar to a kneaded eraser. It doesn’t fully eraser when using the roller side which is nice sometimes when you don’t what to fully erase a sketch. I definitely gravitate to my other erasers more but I do find some value in having this eraser. I can see putting this eraser in a pencil bog to go. The one item I received that I have not used is the small sandwich sticky notes. Its cute and may use it eventually but I currently don’t have a use for them. I do really enjoy the pencil that came in the box. It is very similar to another pencil I have for sketching but because this pencil is so cute I find myself gravitating toward this pencil more.
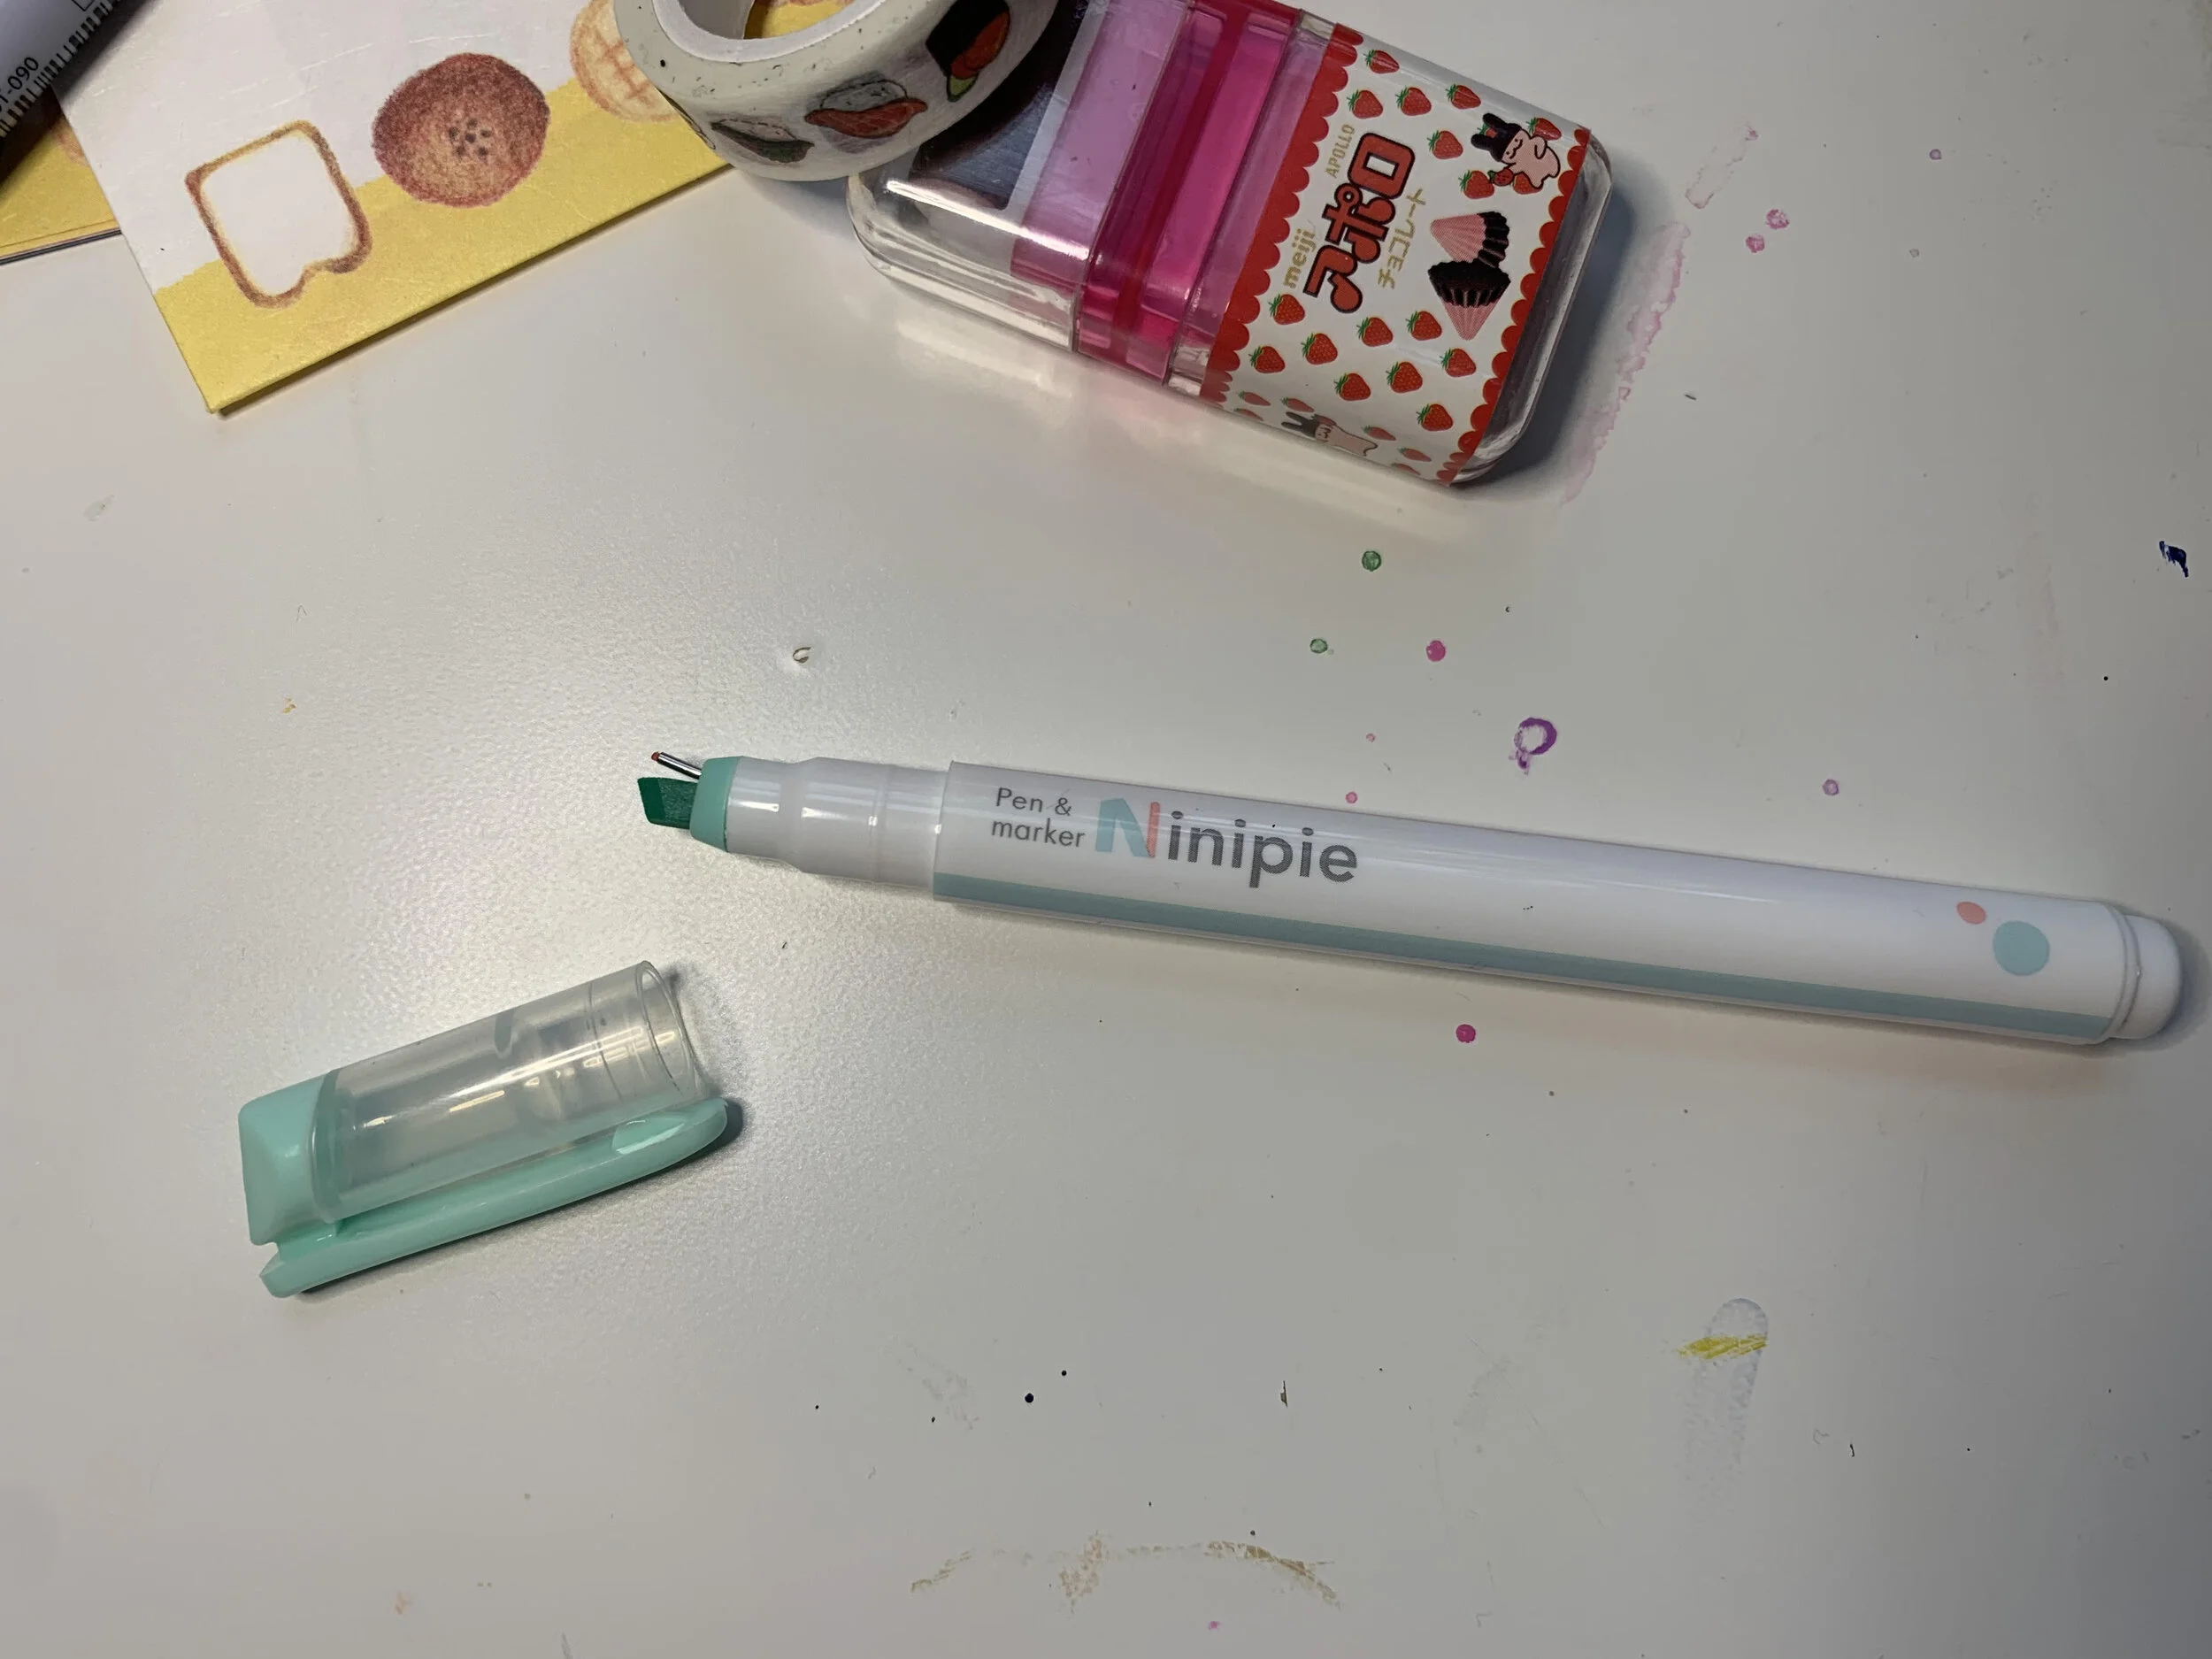
One of my favorite items from the whole box was this pen and highlighter combination. It is unlike anything I have ever seen. Holding it in a way that doesn’t use both takes a second to get used to. I love the color combination and I love that I can highlight and write with one utensil. I can see myself using this in my new planner I also got in my ZenPop box
The one item I got in my ZenPop box I didn’t really like was the dark grey Brush pen. When it comes to brush push pens or markers I prefer a softer tip. This one is really stiff, which made it difficult for me to use personally. If it was at minimum a fun color I could find more use for it. But my art and even sketches tend to be colorful I don’t imagine my using this often at all. I may try to use it for line work in my sketchbook but again with how stiff it is I think Ill have a difficult time.

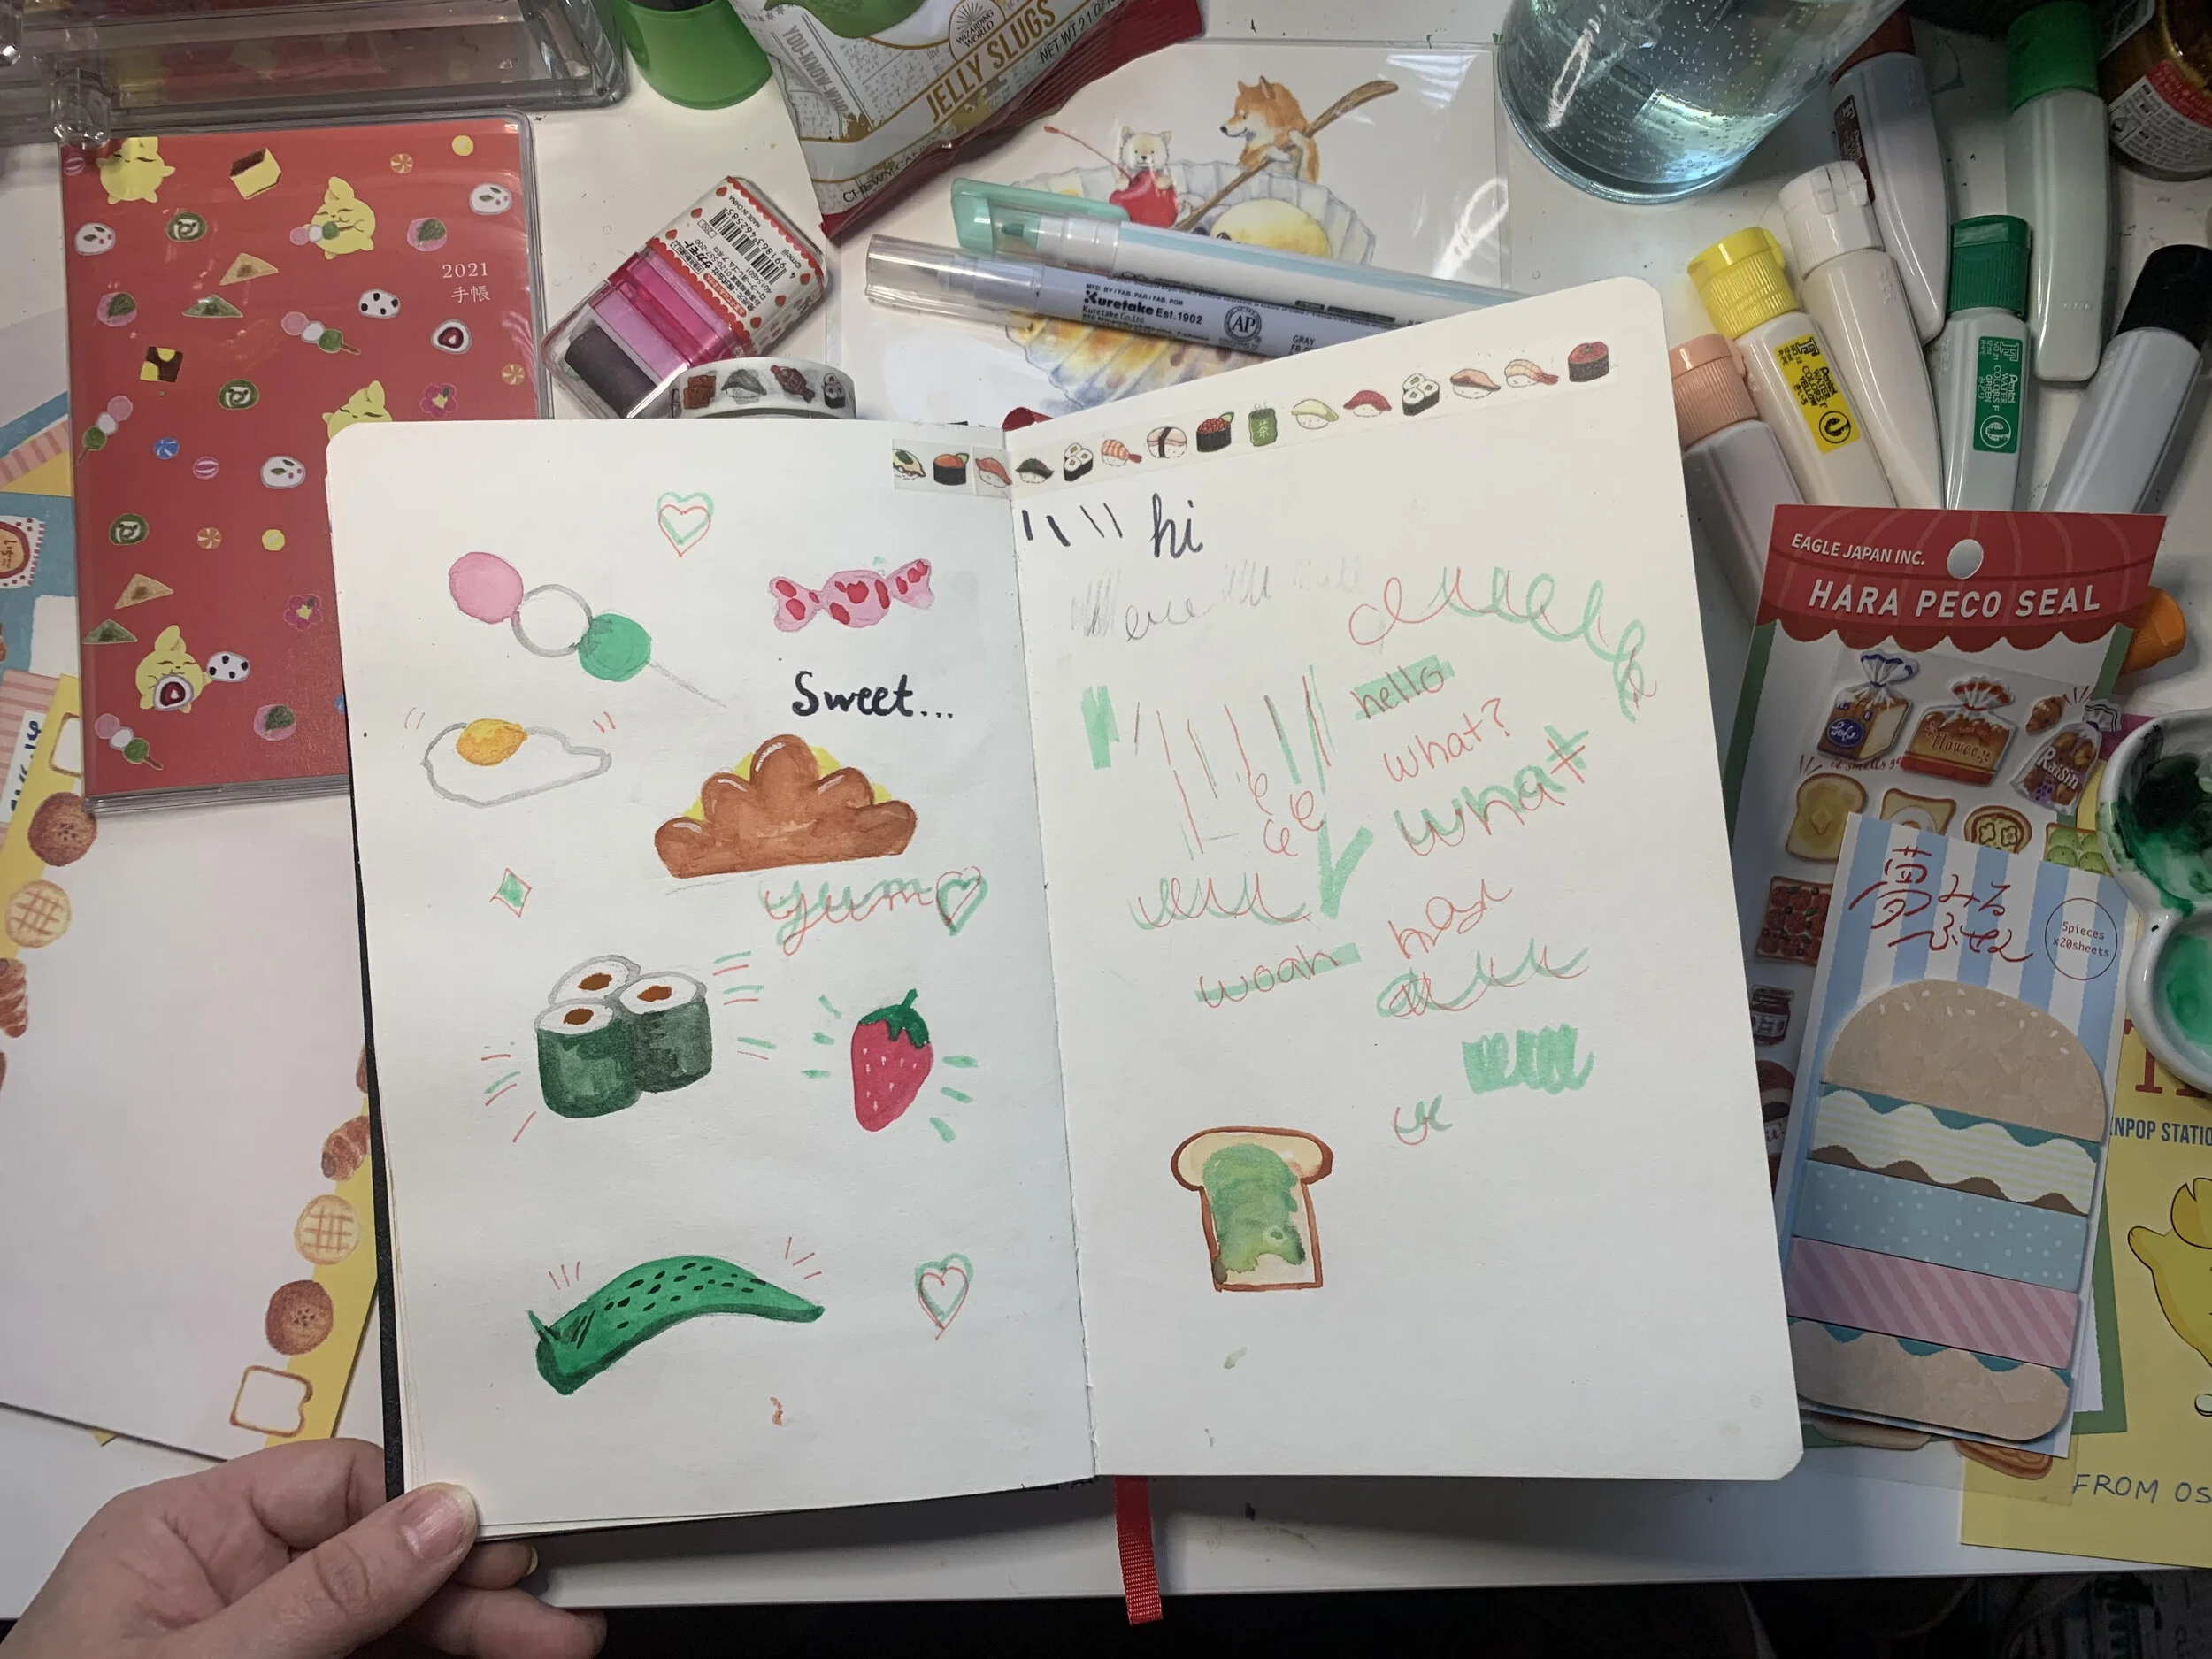
After I opened the box I did some doodles using the products/inspired by the theme of the box. None of the sketches are particularly amazing but I did enjoy and appreciate gathering inspiration in a unique way.
Hello, World!
All in all I really enjoyed my March ZenPop box. While I’m writing this my April Zen Pop box is waiting for me. If you are unsure about giving Ze Pop a try; my experience has been great so far and I absolutely think its worth it. I love stationary supplies and I love anything cute. ZenPop gives me both sent to my door. They send you emails letting you know when the box is processing, on the way, and gives you a heads up before you are charged for the next box. I can see continuing the subscription box for a few months at least. Aprils theme is sakura and I’m sooo excited to see what I got this time.
If you are interesting in getting ZenPop for yourself you can check it out here.
Thanks for hangin,
Mickey
Lately I live, eat, and breath Stardew… More like paint, sell, and play. Lately I’ve made art inspired by the game including some Stardew Valley planner stickers that are now available in my shop. Found here. I’ve painted a Stardew scene including the Stardrop Saloon. I’ve even made a drinking game for a game. Obsessed. I’m obsessed. Scroll for receipts and rules for the Stardew Valley drinking game.

Stardew drinking game!
Drink every time:
-someone isn’t in their shop when you need them
- you miss a fish - you pass out
- Cut scene
- you find something good in the trash
- you get caught for going in the trash
- Attend an event
- You get mail
- Every time you get a chest while fishing
- Add something to the museum/community center
- You buy someone a beer
- You find a diamond
- You complete a journal task
- donate to museum
- down a level in the mine
- You get a new achievement
- You find a lost book
Take a shot every time:
- you receive a stardrop
- you give a bouquet
- you give a mermaid amulet
- the train passes through
- you travel outside of Pelican Town
- you complete a community center room
- You lose the egg hunt
- You find the trash hat
- you see slime trying to mate
- A fairy visits the farm
- Earthquake
- Meteorite
- A witch visits
- Santa visits
- You find a stone owl
- An animal is born
- Child is born
- Find a prismatic shard
- Get a Dino egg
- Receive a reward from the museum
- a friend interrupts your cut scene
- Finish bundle
- Complete a bundle
Happy playing and drinking!!
In a previous blog post I mentioned this quote by Bert Hellinger “Human beings can only love things that are imperfect because perfect has never been real and real has never been perfect” I wanted to touch this again but talk more about accepting yourself. You are imperfect and that’s ok. As Dr. Hellinger stated perfect has never been real so saving your love for yourself for when you are perfect its unproductive and harmful because perfect isn’t real. Humans aren’t perfect. Don’t strive for perfection in yourself strive for growth and acceptance.
If when you think of yourself and you list things like anxiety, depression, ADHD, and/or chronic illness you see this is negatives or things that need to be hidden, you are not allowing yourself to shine in your truest most authentic self. These things feel negatives and burdensome and deserve to be hidden. However, if you don’t eat what’s on your plate you’ll starve. That is so much easier said than done. Allow yourself some grace in knowing its ok to not be perfect. Accept yourself, the good, the bad, the ugly, the imperfect. You are perfectly imperfect.

Sending you all the love and acceptance,
Mickey
“There’s no Crying in baseball!” If you know where that quote is from lets be friends. A lot of us have been taught to not cry or maybe even suck it up. We are taught be strong, and to be strong is to not be vulnerable or show emotion. By learning this we are taught that vulnerability is weakness. This whole idea that strength is in hiding your vulnerability is so far from the truth and prevents us from living our truth. There is power in authenticity. After of years of being taught “be strong don’t cry” or being made to feel weak when we show emotion, our ego gets in the way when we do anything different. Our ego tries to keep us in check by convincing you that the authenticity in being vulnerable is weakness. When you drop your ego and show your authentic vulnerable self that isn’t weakness, it’s freedom. There is nothing more courageous and strong than showing your vulnerability.
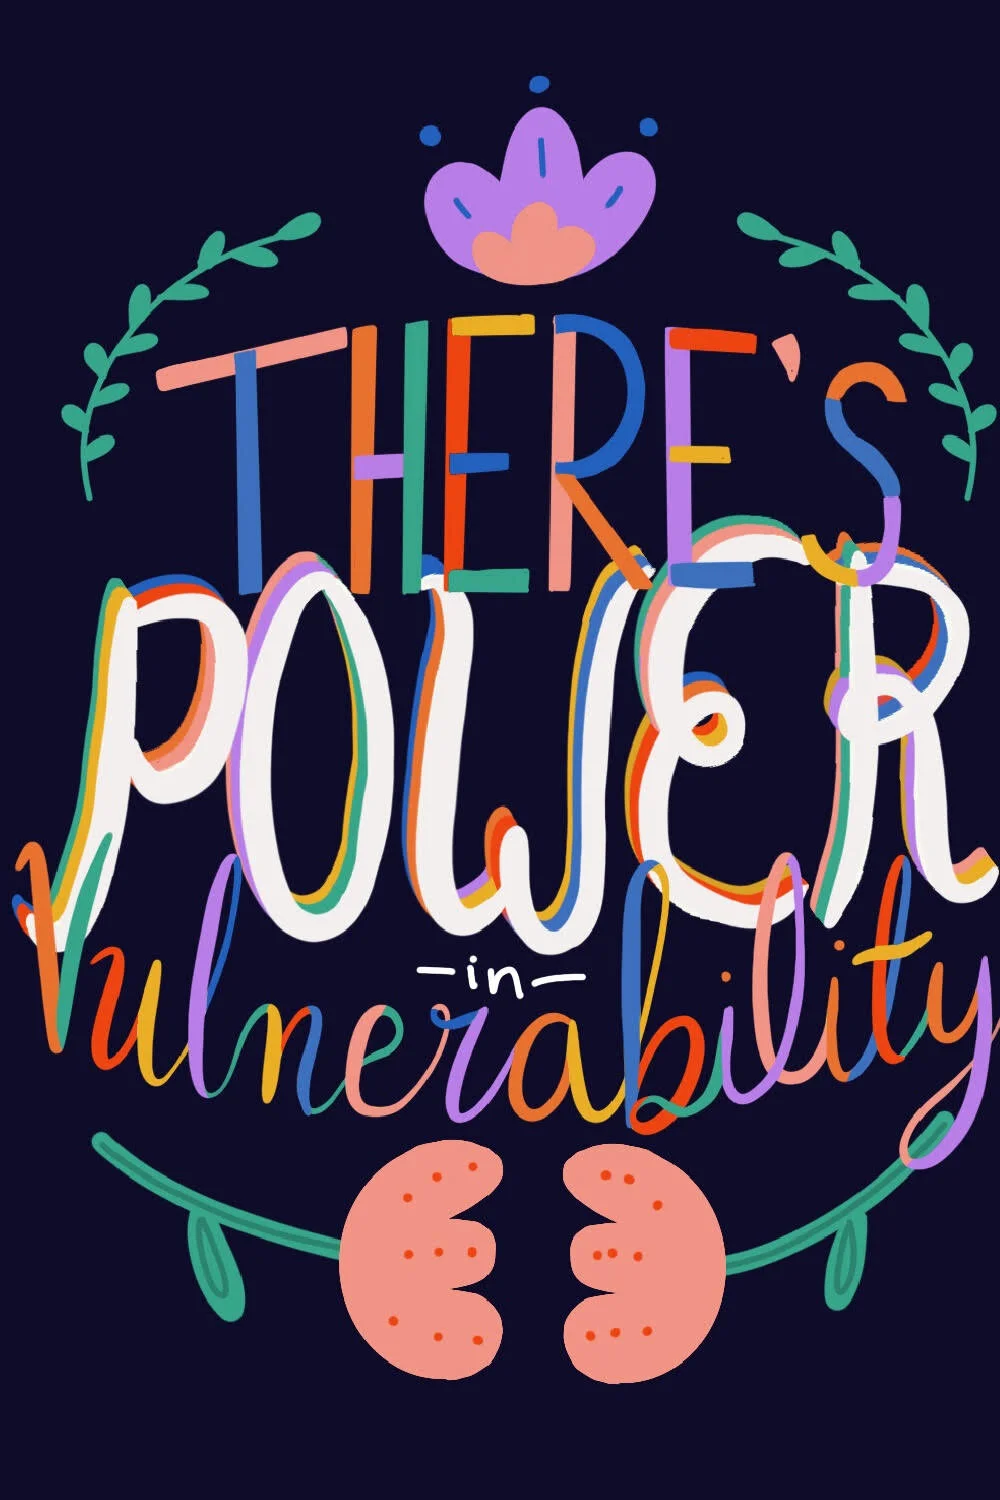
Here is the problem we run into in relationships and connecting with people. People are afraid of being authentic but only when people are authentic can we related to them. Being vulnerable sharing emotion is what we can all relate to and understand in each other. Vulnerability is where we find love. Relating to vulnerability is where we find compassion and strength. I heard this quote from Bert Hellinger that I really helped me to understand. “Human beings can only love things that are Imperfect because perfect has never been real and real has never been perfect”. Perfect isn’t real. Imperfection in being vulnerable is the realest anyone can possibly be.
Go out there show your true strength by being vulnerable.
Kindest Regards,
Mickey
Here is a little step by step guide to painting ice cream using gouache. If you give this a try tag me in your pictures so I can see!
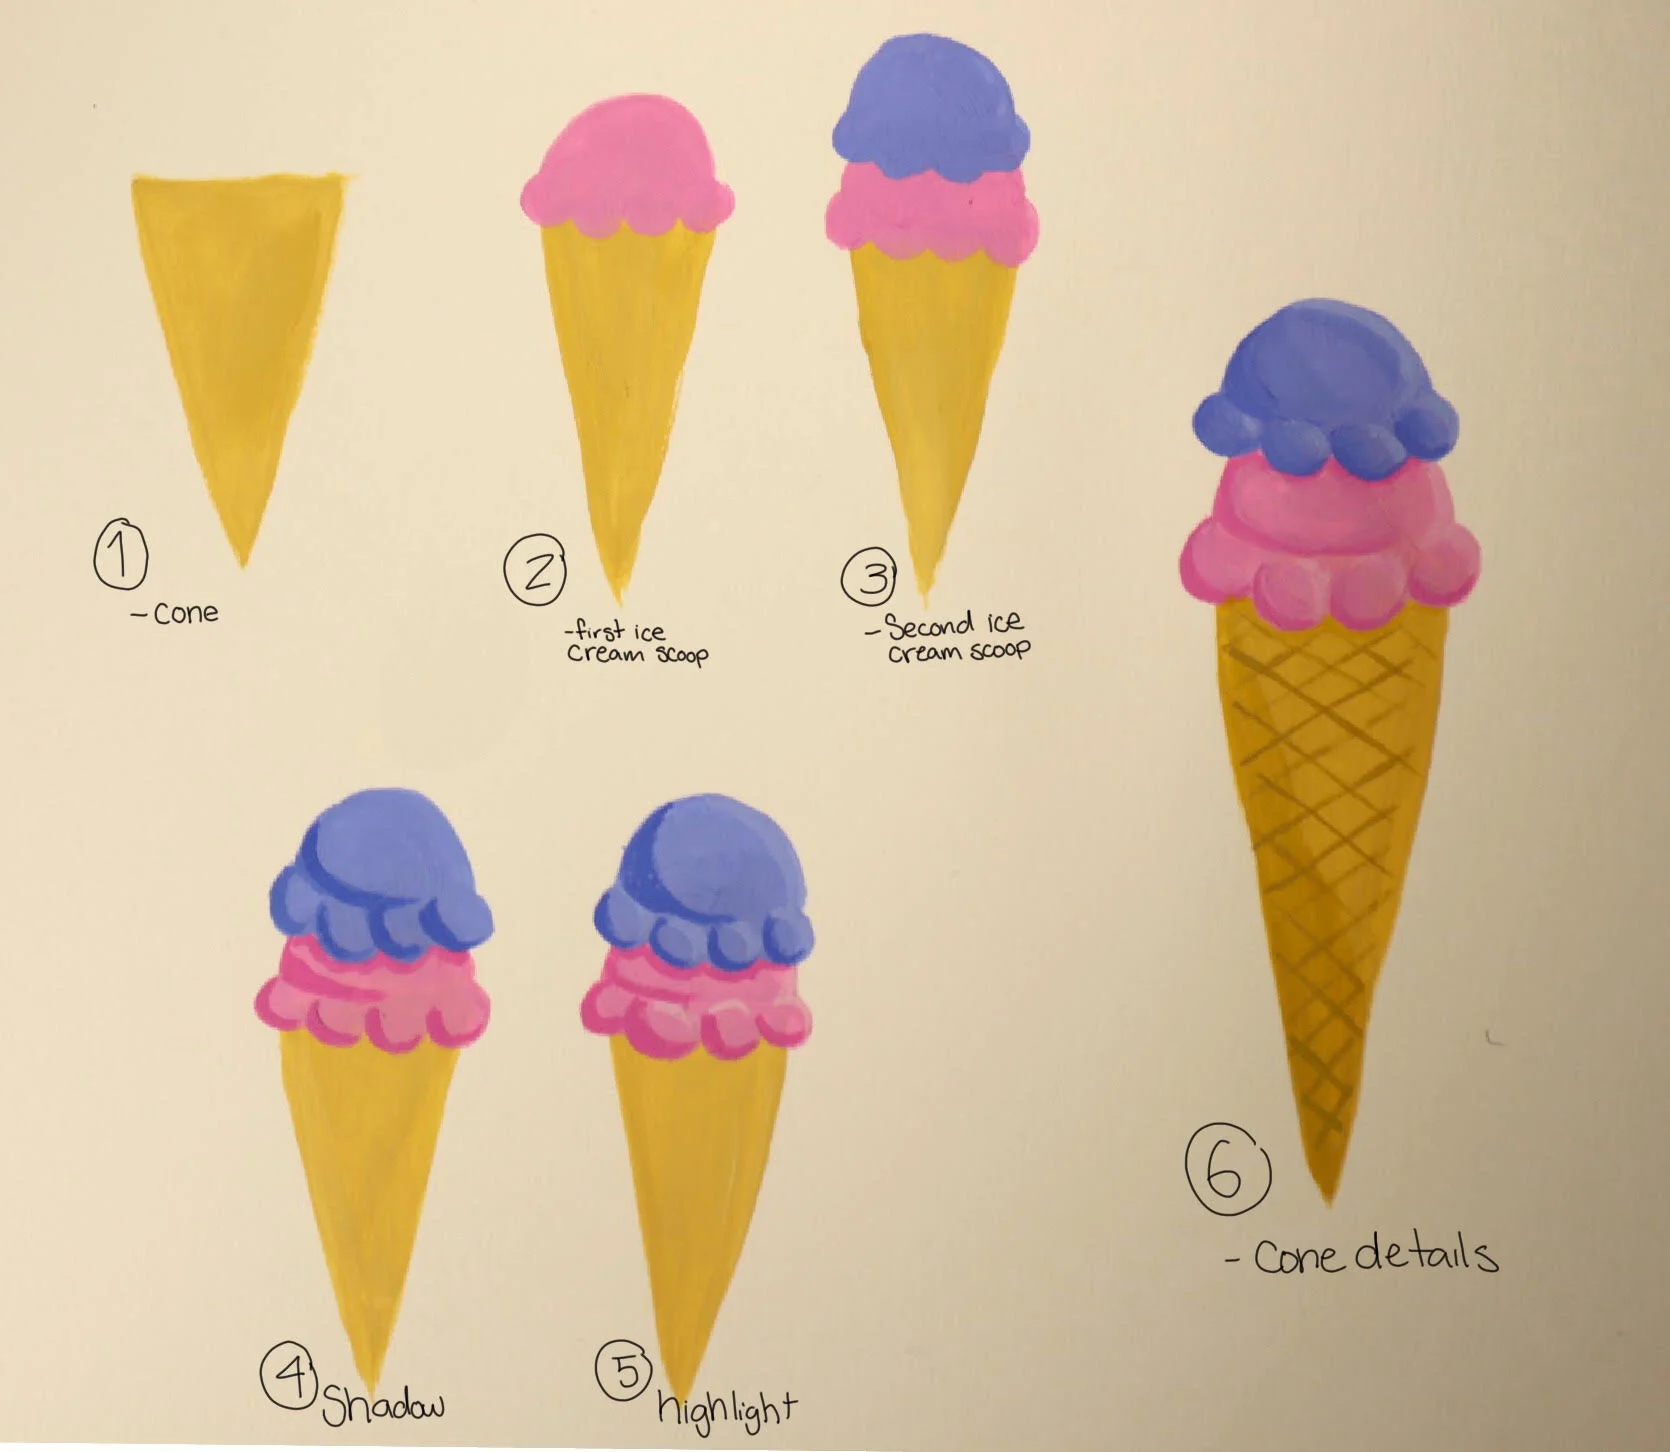
Step one: Paint a triangle in a ice cream cone color.
Step two: Paint the first scoop by painting a D shape on top of the cone with four small circles on the bottom of that D shape.
Step Three: repeat the same sape as in step two but on top of the first ice cream scoop.
Step Four: Mix just a slightly darker you used for the ice cream scoops and add shadows on the bottom right of each circles on the ice cream cream scoops. I also added a line where the crease of the ice cream would be.
Step Five: Mix a slightly lighter color that you used for the ice cream scoops and add highlights. Add the highlights to the top right of the circles and scoops.
Step Six.: Add a shadow and detail lines in diagonal on the ice cream cone.
bonus: if you want the ice cream to have a more gradient effect use a watered down base color of the ice cream to blend into the shadow and highlight areas.
@ahteamickey Made a little how to paint ice cream #TurboTaxLivePick6 #ItWasntMe #DoTheScottsSlide #gouache #artist #HowTo
♬ Ice Cream - BLACKPINK & Selena Gomez
Have fun painting,
Mickey
We’ve all known or least seen a hover parent. That parent that’s watching every move the child makes and stepping in on every mistake to the point they are doing everything for them. With good intentions they are disempowering the child by not letting them make mistakes. Trying things on our own we learn confidence and empower ourselves to do more.
This happens with adults too. We often mistake helping someone with just doing things for them. I know I’m guilty of this. With good intentions we can disempower the people in our lives by just doing it for them. It’s ok to be present and offer guidance. But try not do anything for anyone else that they can do themselves. Don’t disempower the people in your life. Empower them to handle the things they can and be there for the things that can’t.
Until Next Time,
Mickey
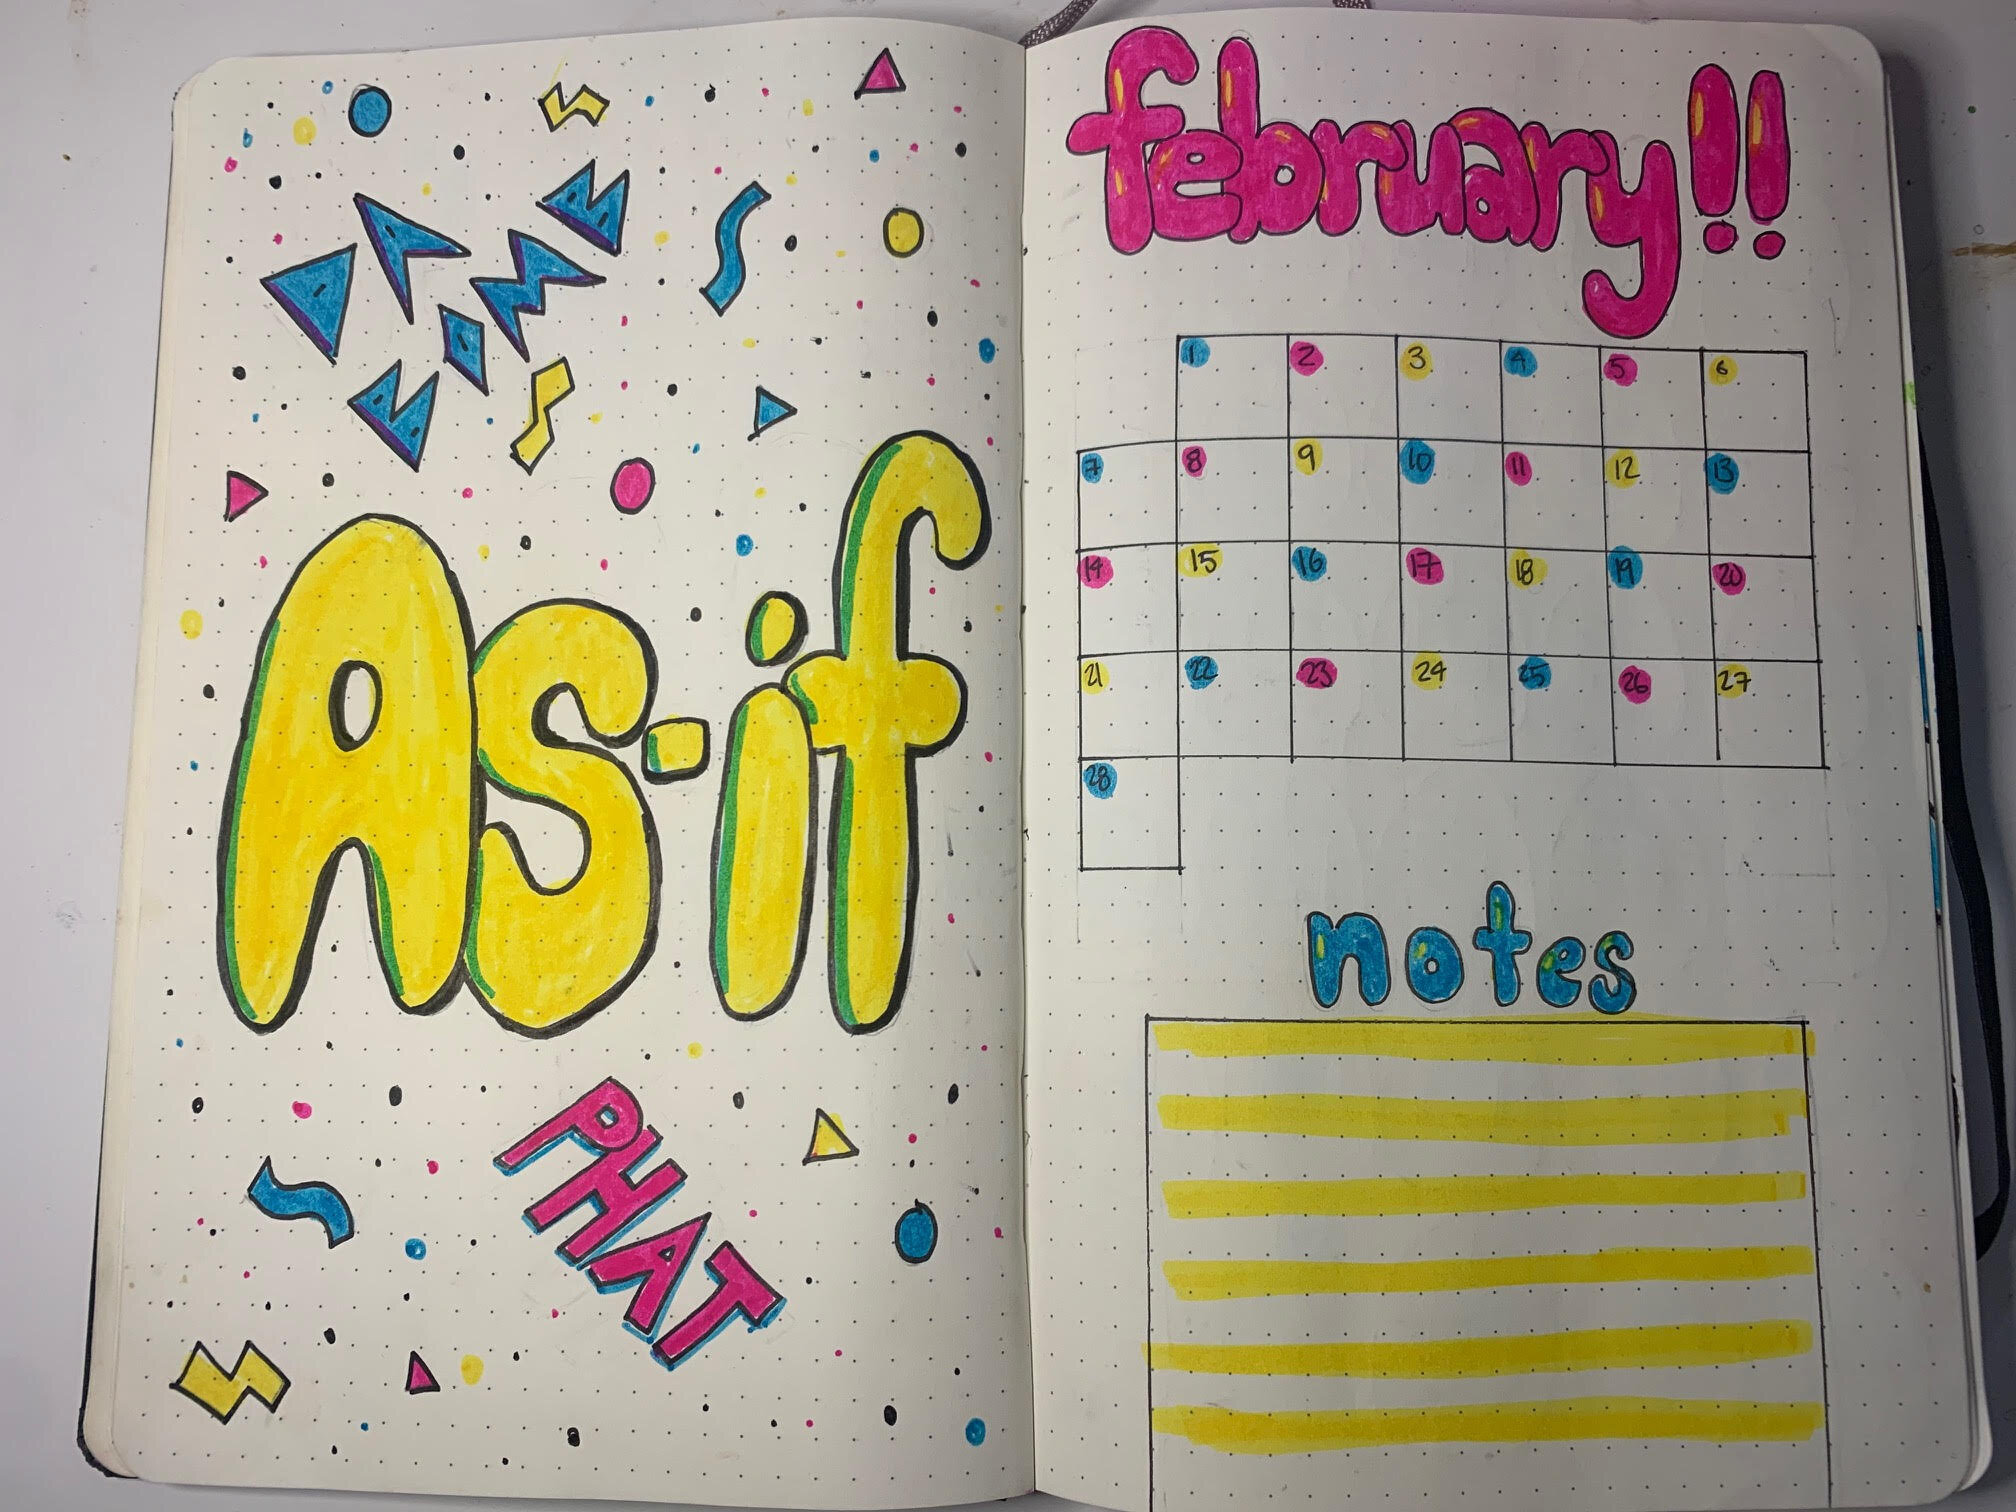
Happy last weekend of January! you made it! For February’s bullet journal theme is drum roll 90s! Its no secret that I love nostalgia and because of that I love the 90s. By the end of last months theme (Among Us) I was done and over it. I want a theme this month that was a litte more broad. I wanted something I could play with and not get bored of. I recently added a 90’s sticker sheet to my Esty shop (you can find that here) I did a fake bullet journal type page and I had fun making it that I wanted to so a whole month 90s. Lets get into it.
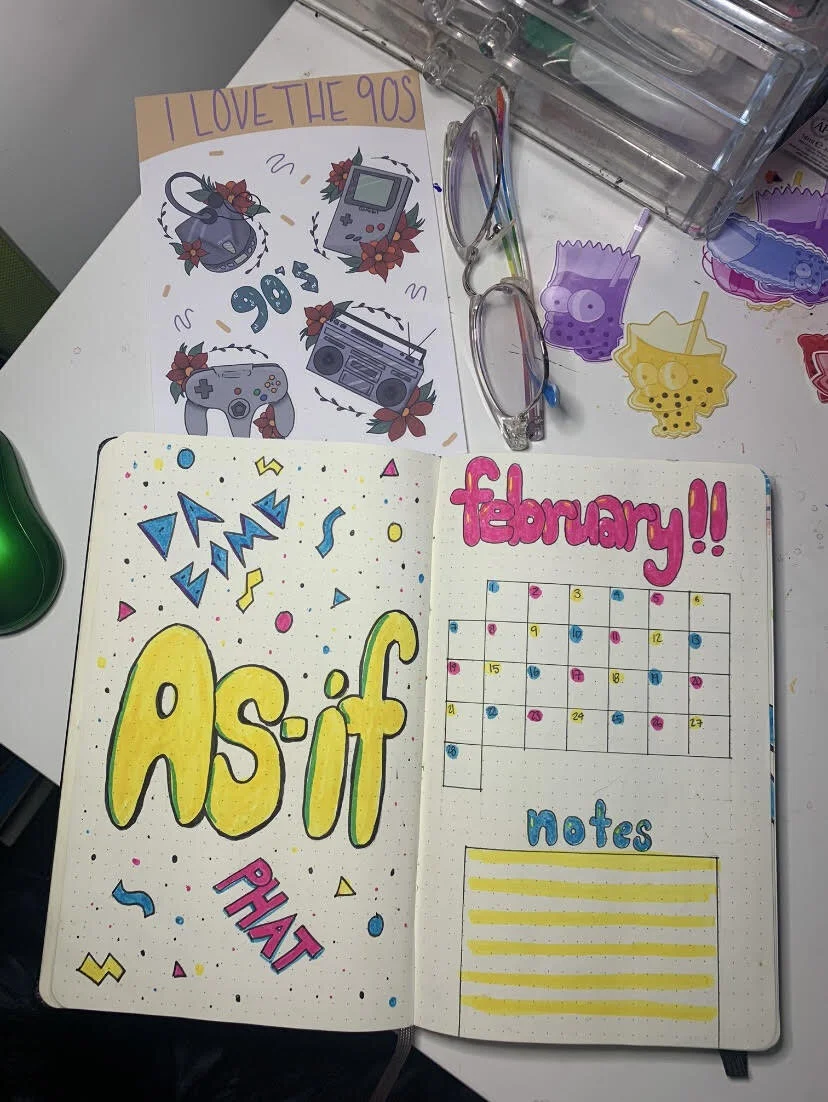
For the cover page I did some 90’s inspired patterns with popular 90’s slang. This was so fun and nostalgic, I felt like i was in middle school all over again decorating my binder or front page of my notebook. So the month at a glance page I kept it pretty simple again. I really like one page versus two, so i used use some classic 90’s bubble letters and carried over the colors from the cover page.
Next one of my favs the mood tracker page. Who had a tamagotchi and has thought about getting one again as an adult? slowly raises hand. I loved them back in the day and I feel like watching one poop and eat and eventually die would bring me so much joy lol. So I used tamagotchis as my mood tracker for this month. I love how this page turned out and I’m very excited to fill in my moods for the month. Not only do I plan on coloring in the tamagotchi but also filling in the middle screen with a smiley face or sad face. I think the finished page will be really fun. Next to that I did a simple 90s inspired graphic page for lists.
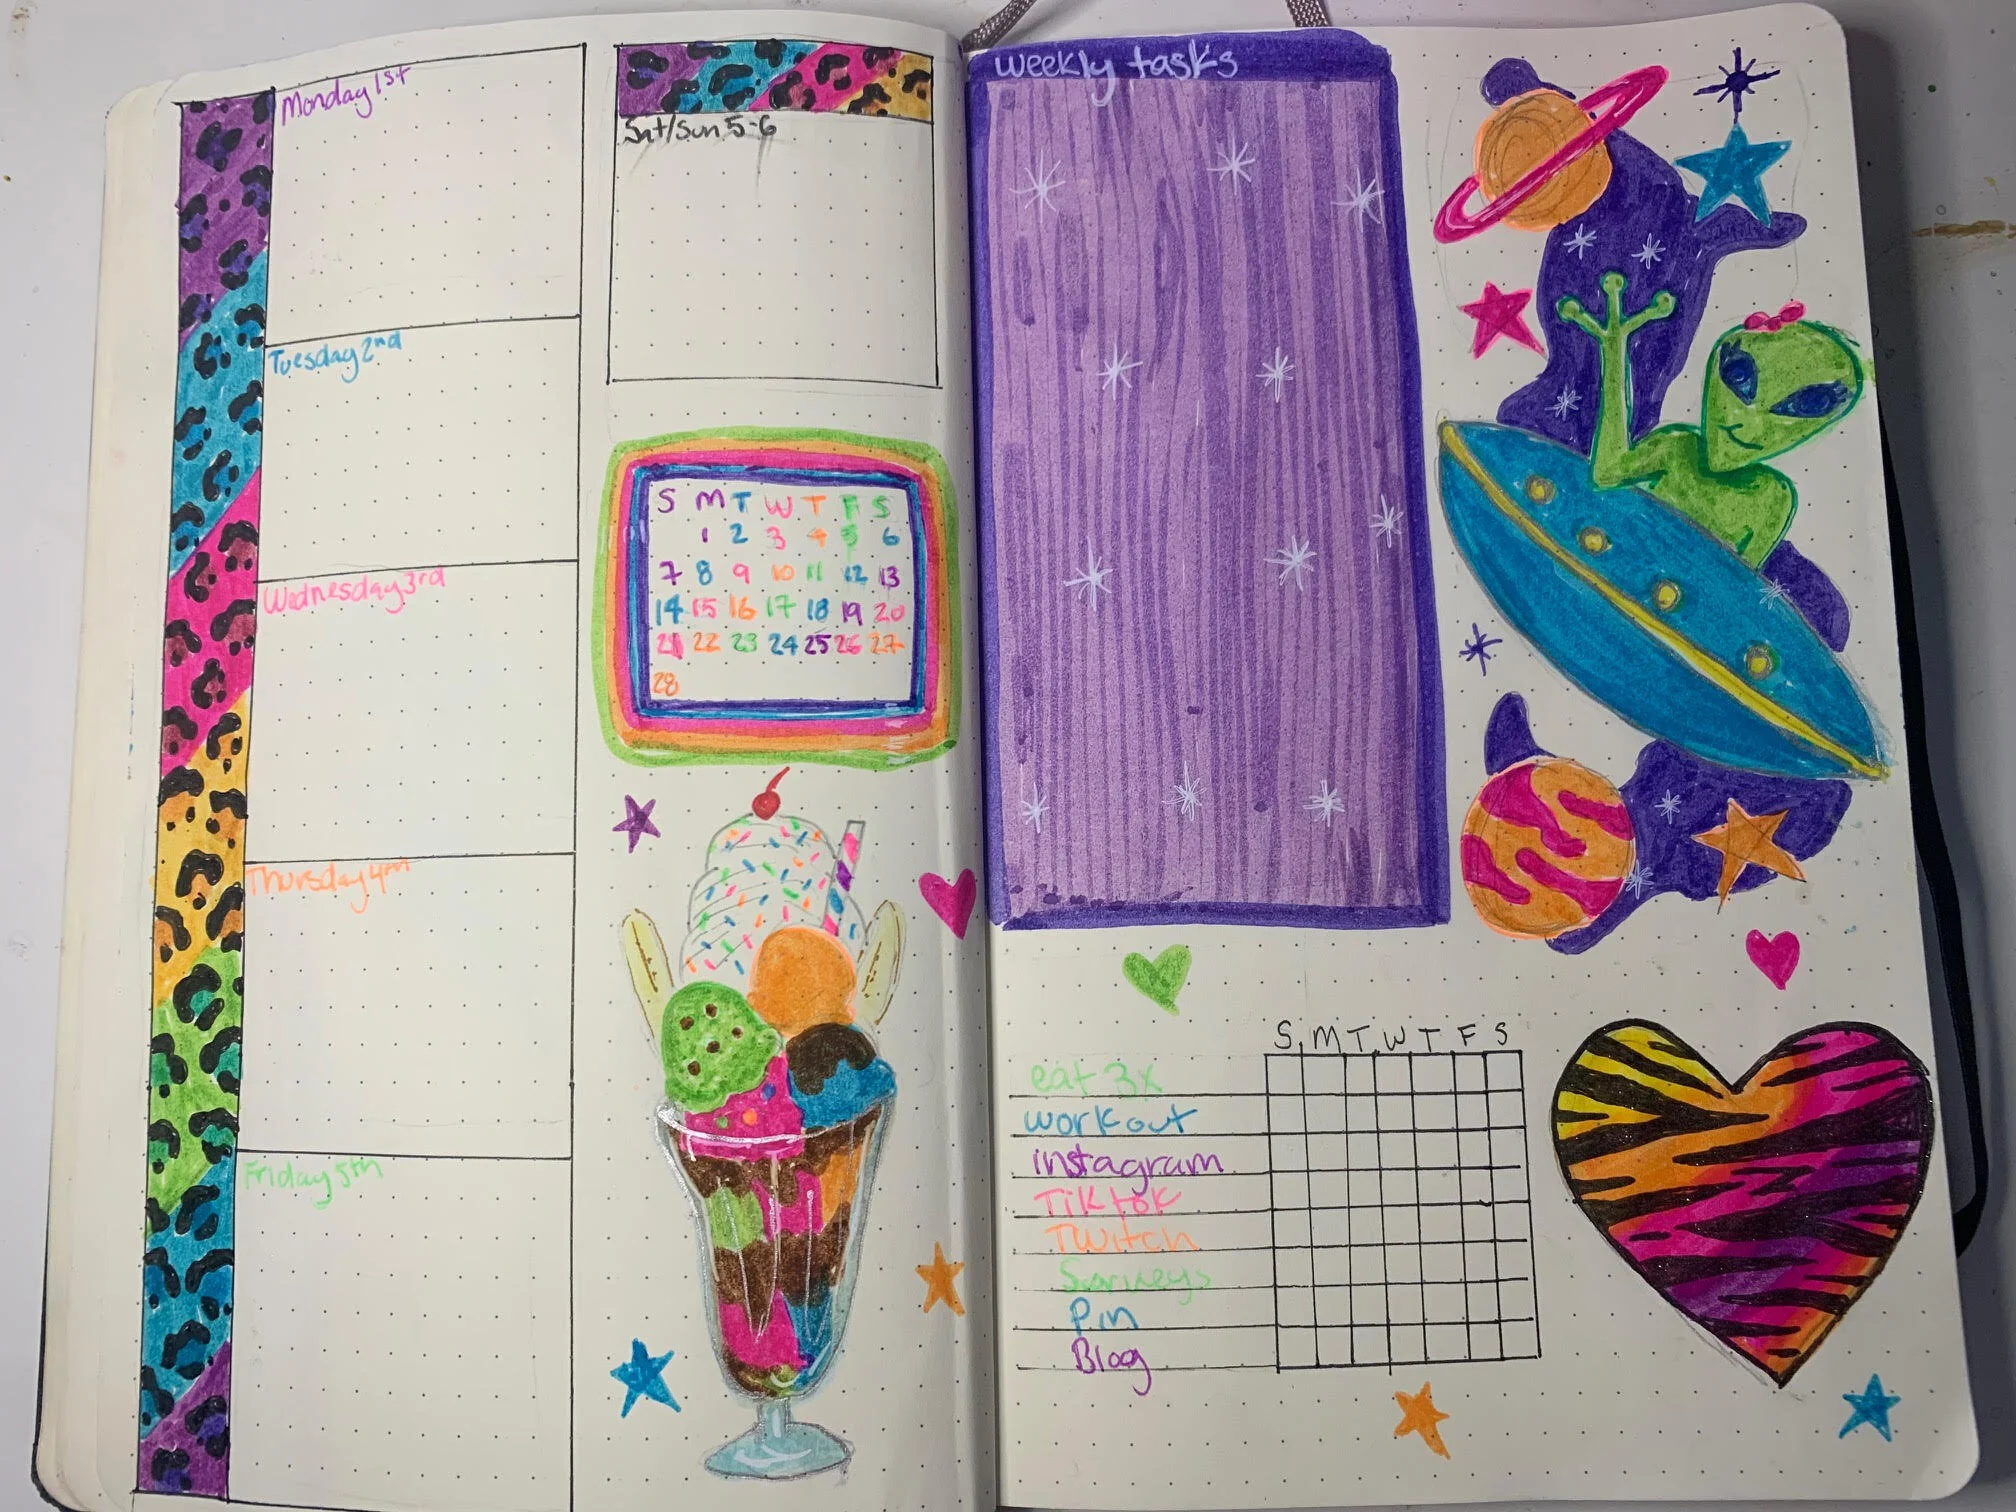
For each weekly spread, with the help and encouragement of my twitch chat, Ill be picking a 90’s theme like 90s cartoons or 90’s toys. The first week I wanted to pay homage once again to everyone’s notebooks and school supplies with Lisa Frank. I am obsessed with how this turned out. I enjoyed drawing this spread so much. Twitch got to see me create this spread live and I’m thinking about uploading that video to YouTube to share with everyone else. Ill of course post it here also. If you’d like to watch me create art including bullet journals live you can find my twitch here. Let know if you like how this weekly spread turned out as much as I do.
Ill be live streaming my weekly spreads this month on twitch because of how excited I am about this month. Follow me on twitch to get notified about when I go live.
Until Next Time,
Mickey
Its that time of the month! no not that time a Flo… Its time to get ready for next month in the 2021 bullet journal. February is almost here and I cant believe how fast January went by. Before we dive into my February bullet journal lets review January. More specifically what worked for me and what didn’t work for me. To see more of my January Bullet journal check it out here: Jan Bujo.
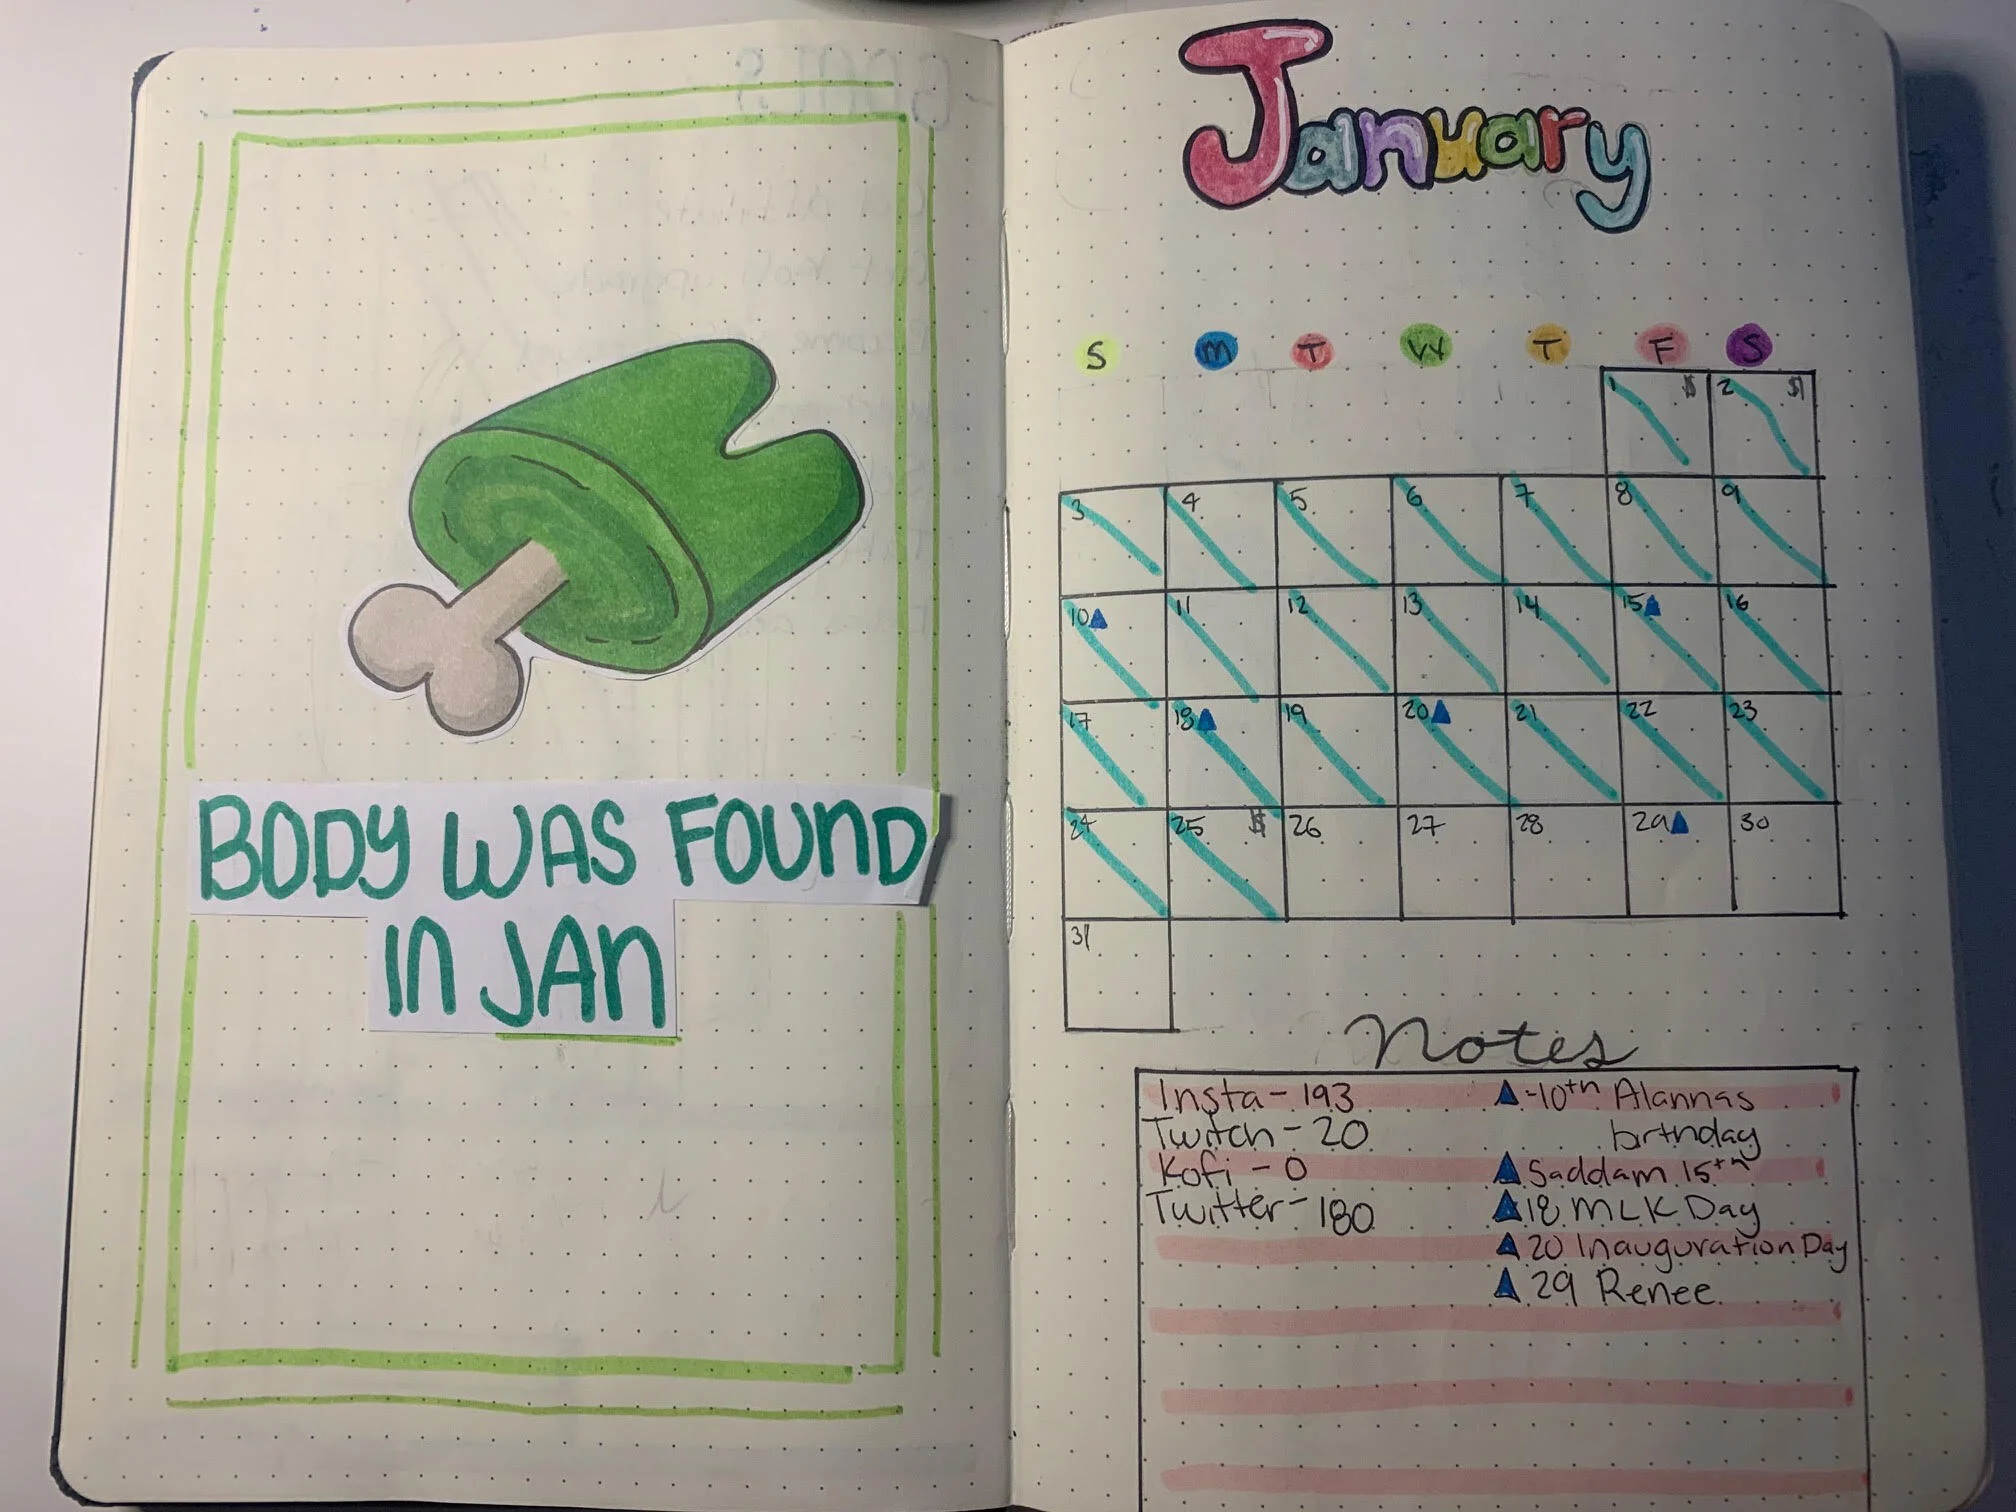
I enjoyed January’s mood tracker this really worked for me. Use a scale of five colors allowed me to analyze how I felt with putting a true label or name to how I felt. This is the first time in a long time I actually took the time to sit with my emotions and figure out how I felt the previous day and why. Through this practice I realized that I associate how good I felt with how productive I was. If I felt like I didn’t do anything significantly productive I felt bad and in turn felt bad about myself. Though I do love that I do that I do love that I now know that about myself and can acknowledge that about myself and my feelings.
I never enjoyed habit trackers I’ve always had a hard time keeping up with them by the end of the month I cared less about the things I felt important to track at the beginning of the month. Which would lead to me not tracker habits by the end of the month and kind of leaving me feeling bad about it. I realized in week two there were some thing I wanted to make habits of so I started doing weekly habit trackers. This really works for me. This allowed me to change the habits weekly without looking at a daunting monthly tracker.
Those were the biggest take aways from Januarys Bullet journal. Tomorrow Ill post What I have so far for February!
Until next time,
Mickey
So I’ve reviewed the Himi Jelly gouache plant. If you missed it you can find that blog post: here. So now you might be considering getting the paint yourself OR you might just be curious as to how one might use that paint. If that is the case you are in luck! I’ll show how I use them. Also a reminder that I am no gouache expert but I use gouache paint and this is how I use it.
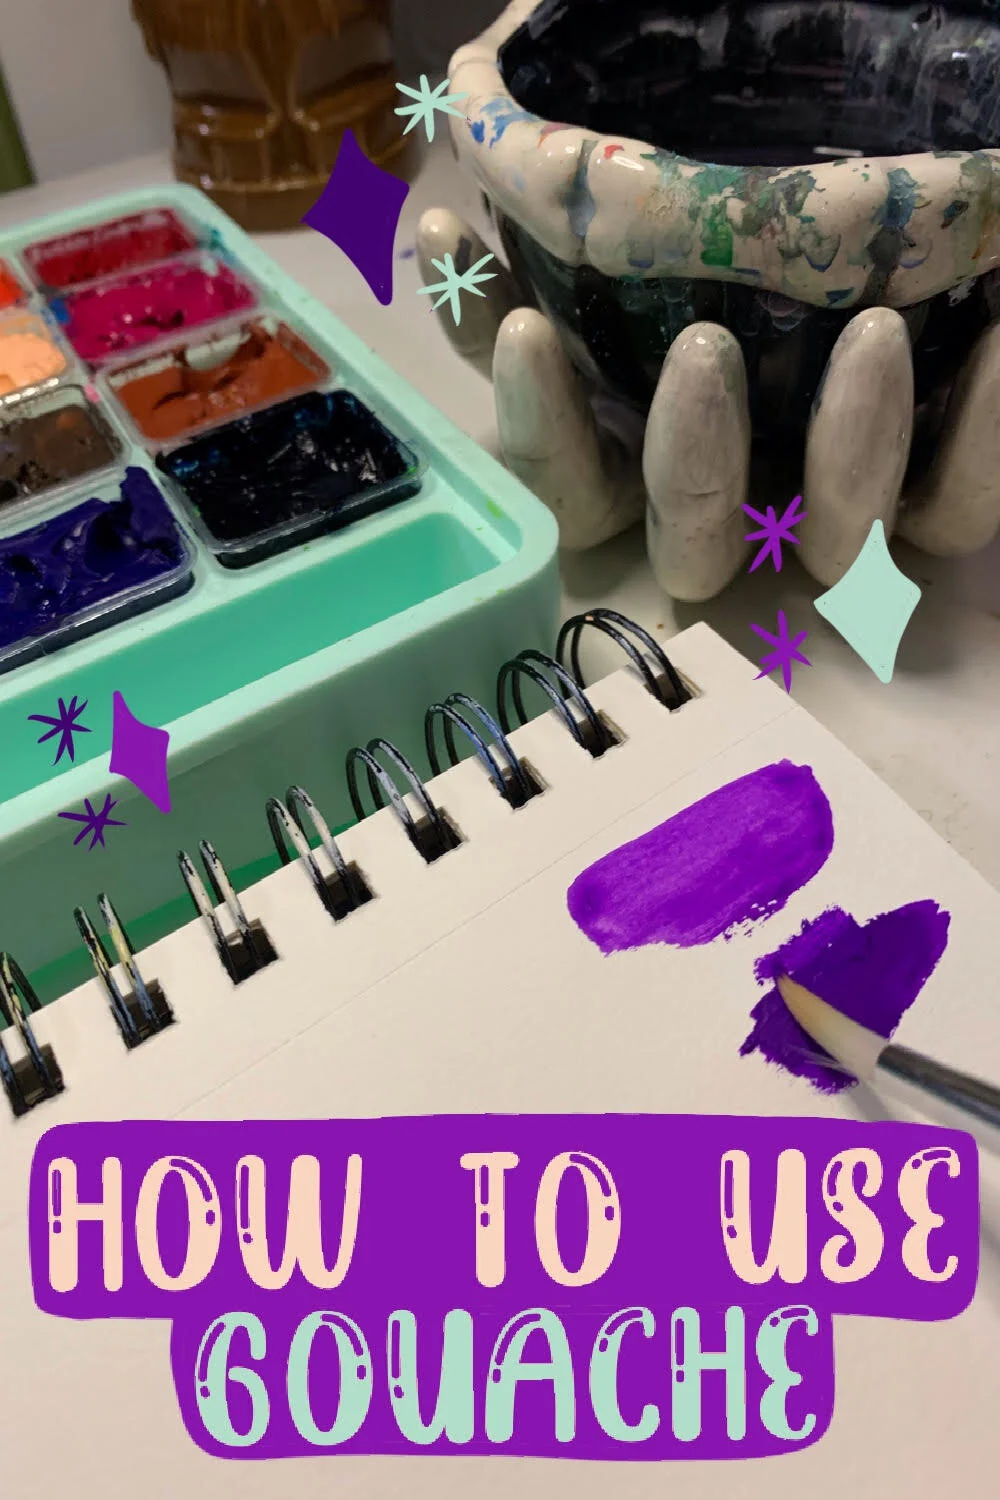
The best technique for using gouache in my opinion is layering until you get the desired look. You can do this a couple different ways. Gouache can be watered down to a watercolor look. So ! like to start there. I get my idea for the painting down with a watercolor like base. Then I’ll layer on top of that. I use less and less water to get the desired opacity. The layering technique for me is ideal and creates some beautiful color mixing and texture. I think layering in this way is way is what makes gouache so unique. Below are some examples of what gouache can look like with more or less water.
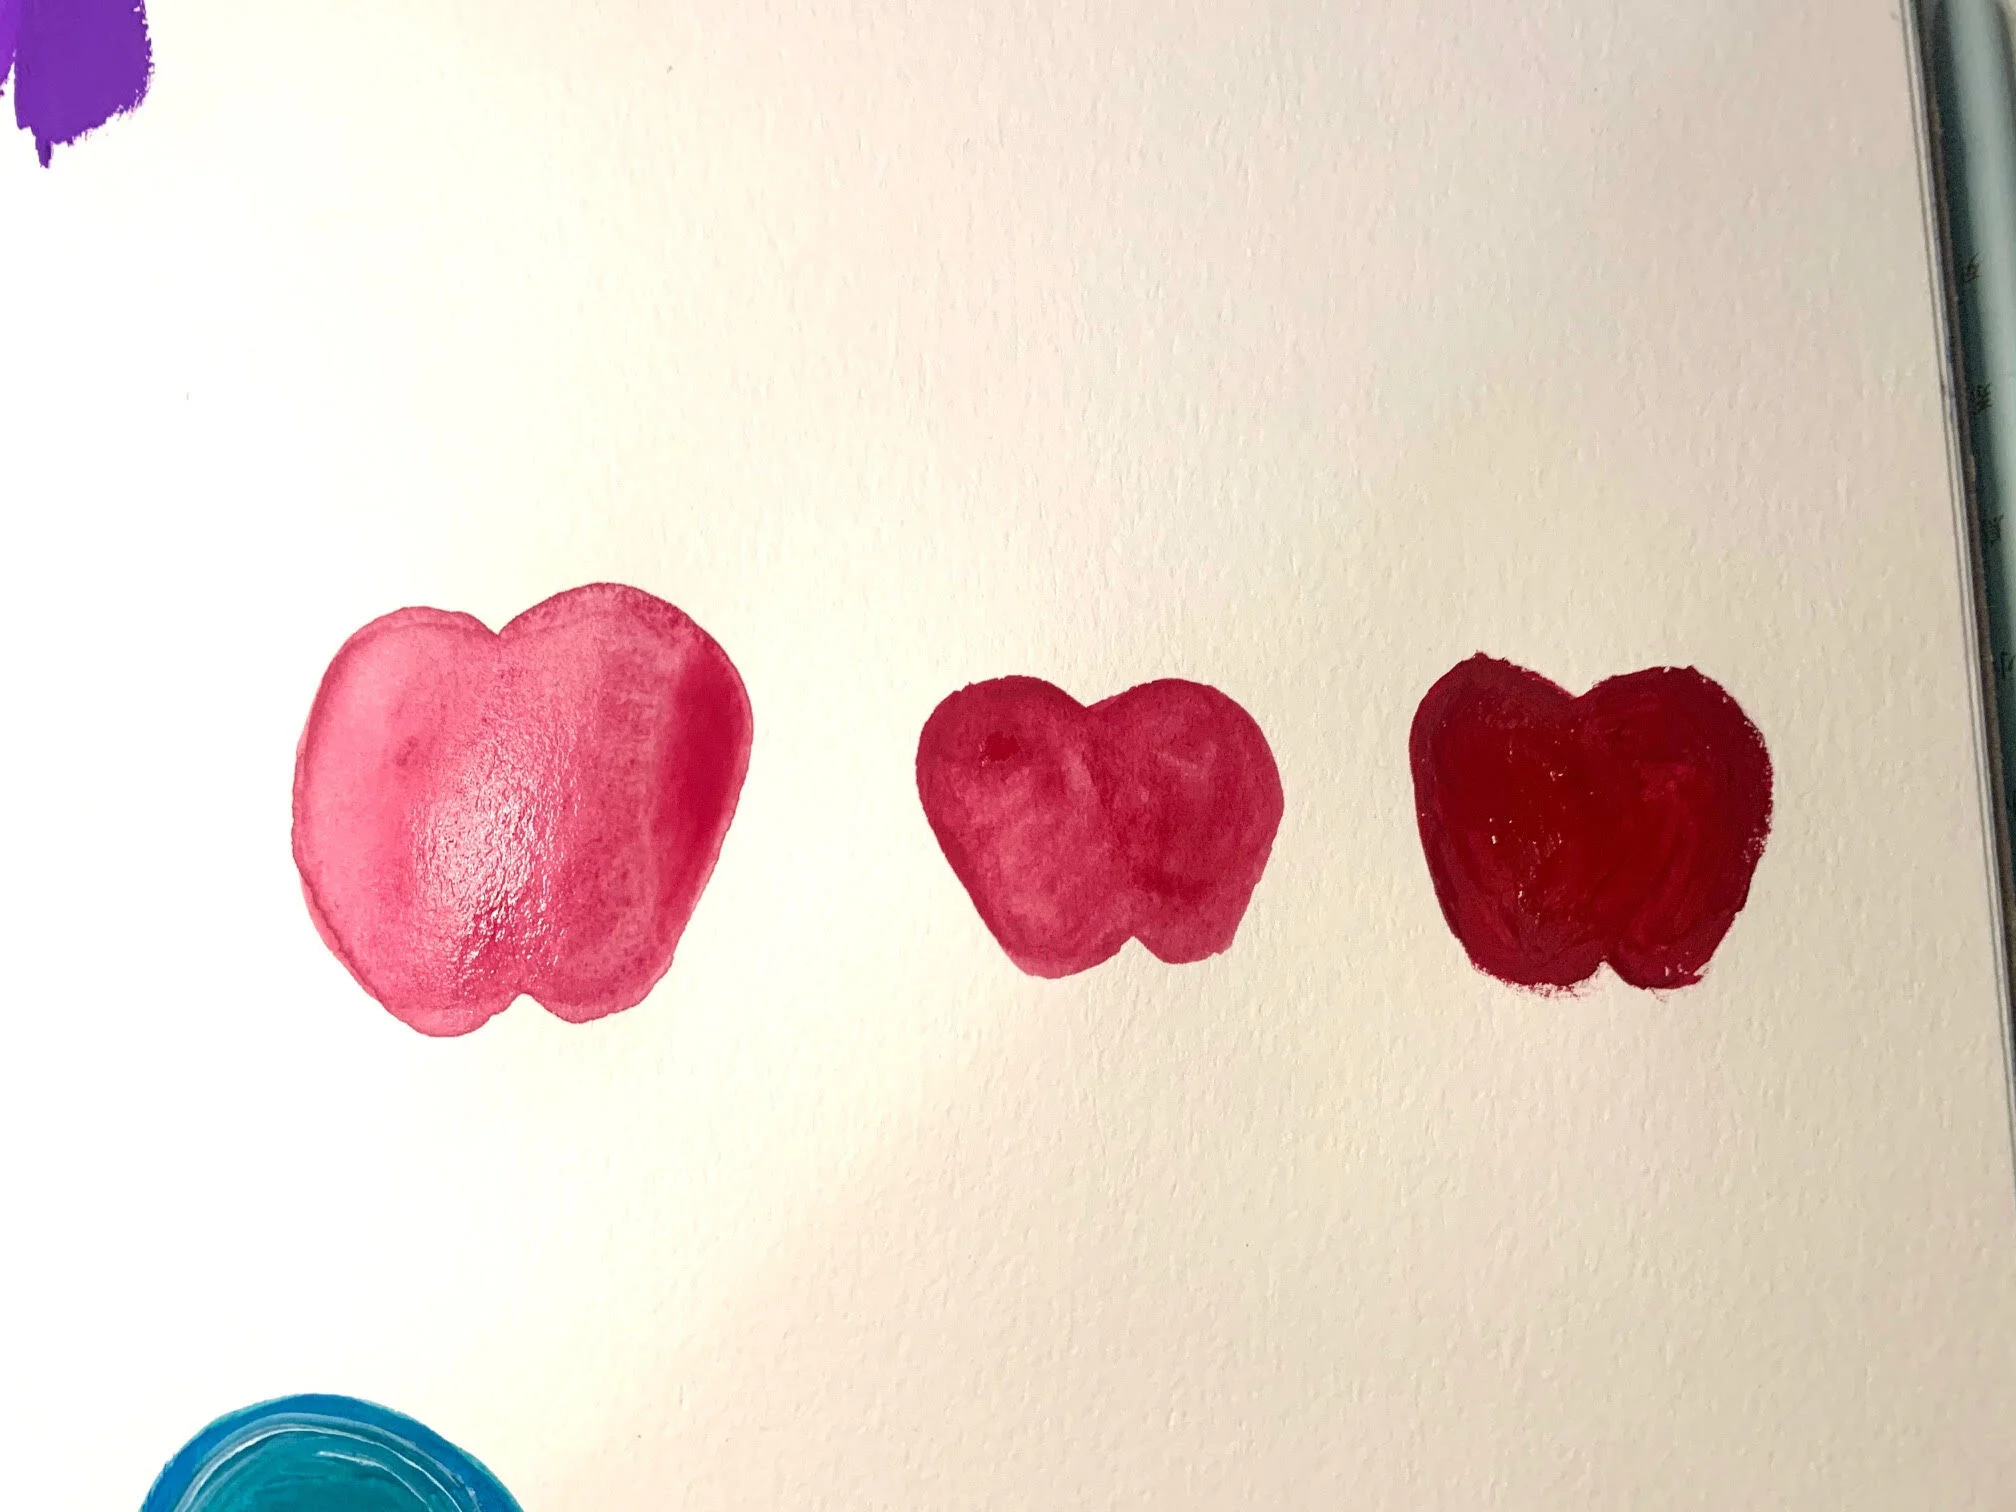
Below I painted a simple apple to show how I layer the paint starting with a watercolor like opacity then to a more opaque finished piece.
I hope this was helpful or insightful. Gouache takes getting used to. So my best advice is to play. Play with the water to paint ration, play with how colors mix together, and just play. Trail and error is the best way to use anew medium you might not be familiar with. once you play around gouache really is a fun medium. Let me know if you give it a try!
Until next time,
Mickey
I want to start weekly mindful Monday posts. I want to write short (no promises) mindful post. Like a weekly advice column. That will hopefully inspire a lettering or typography piece to go along with it. So advice meets art. Well anyways here’s my first one:
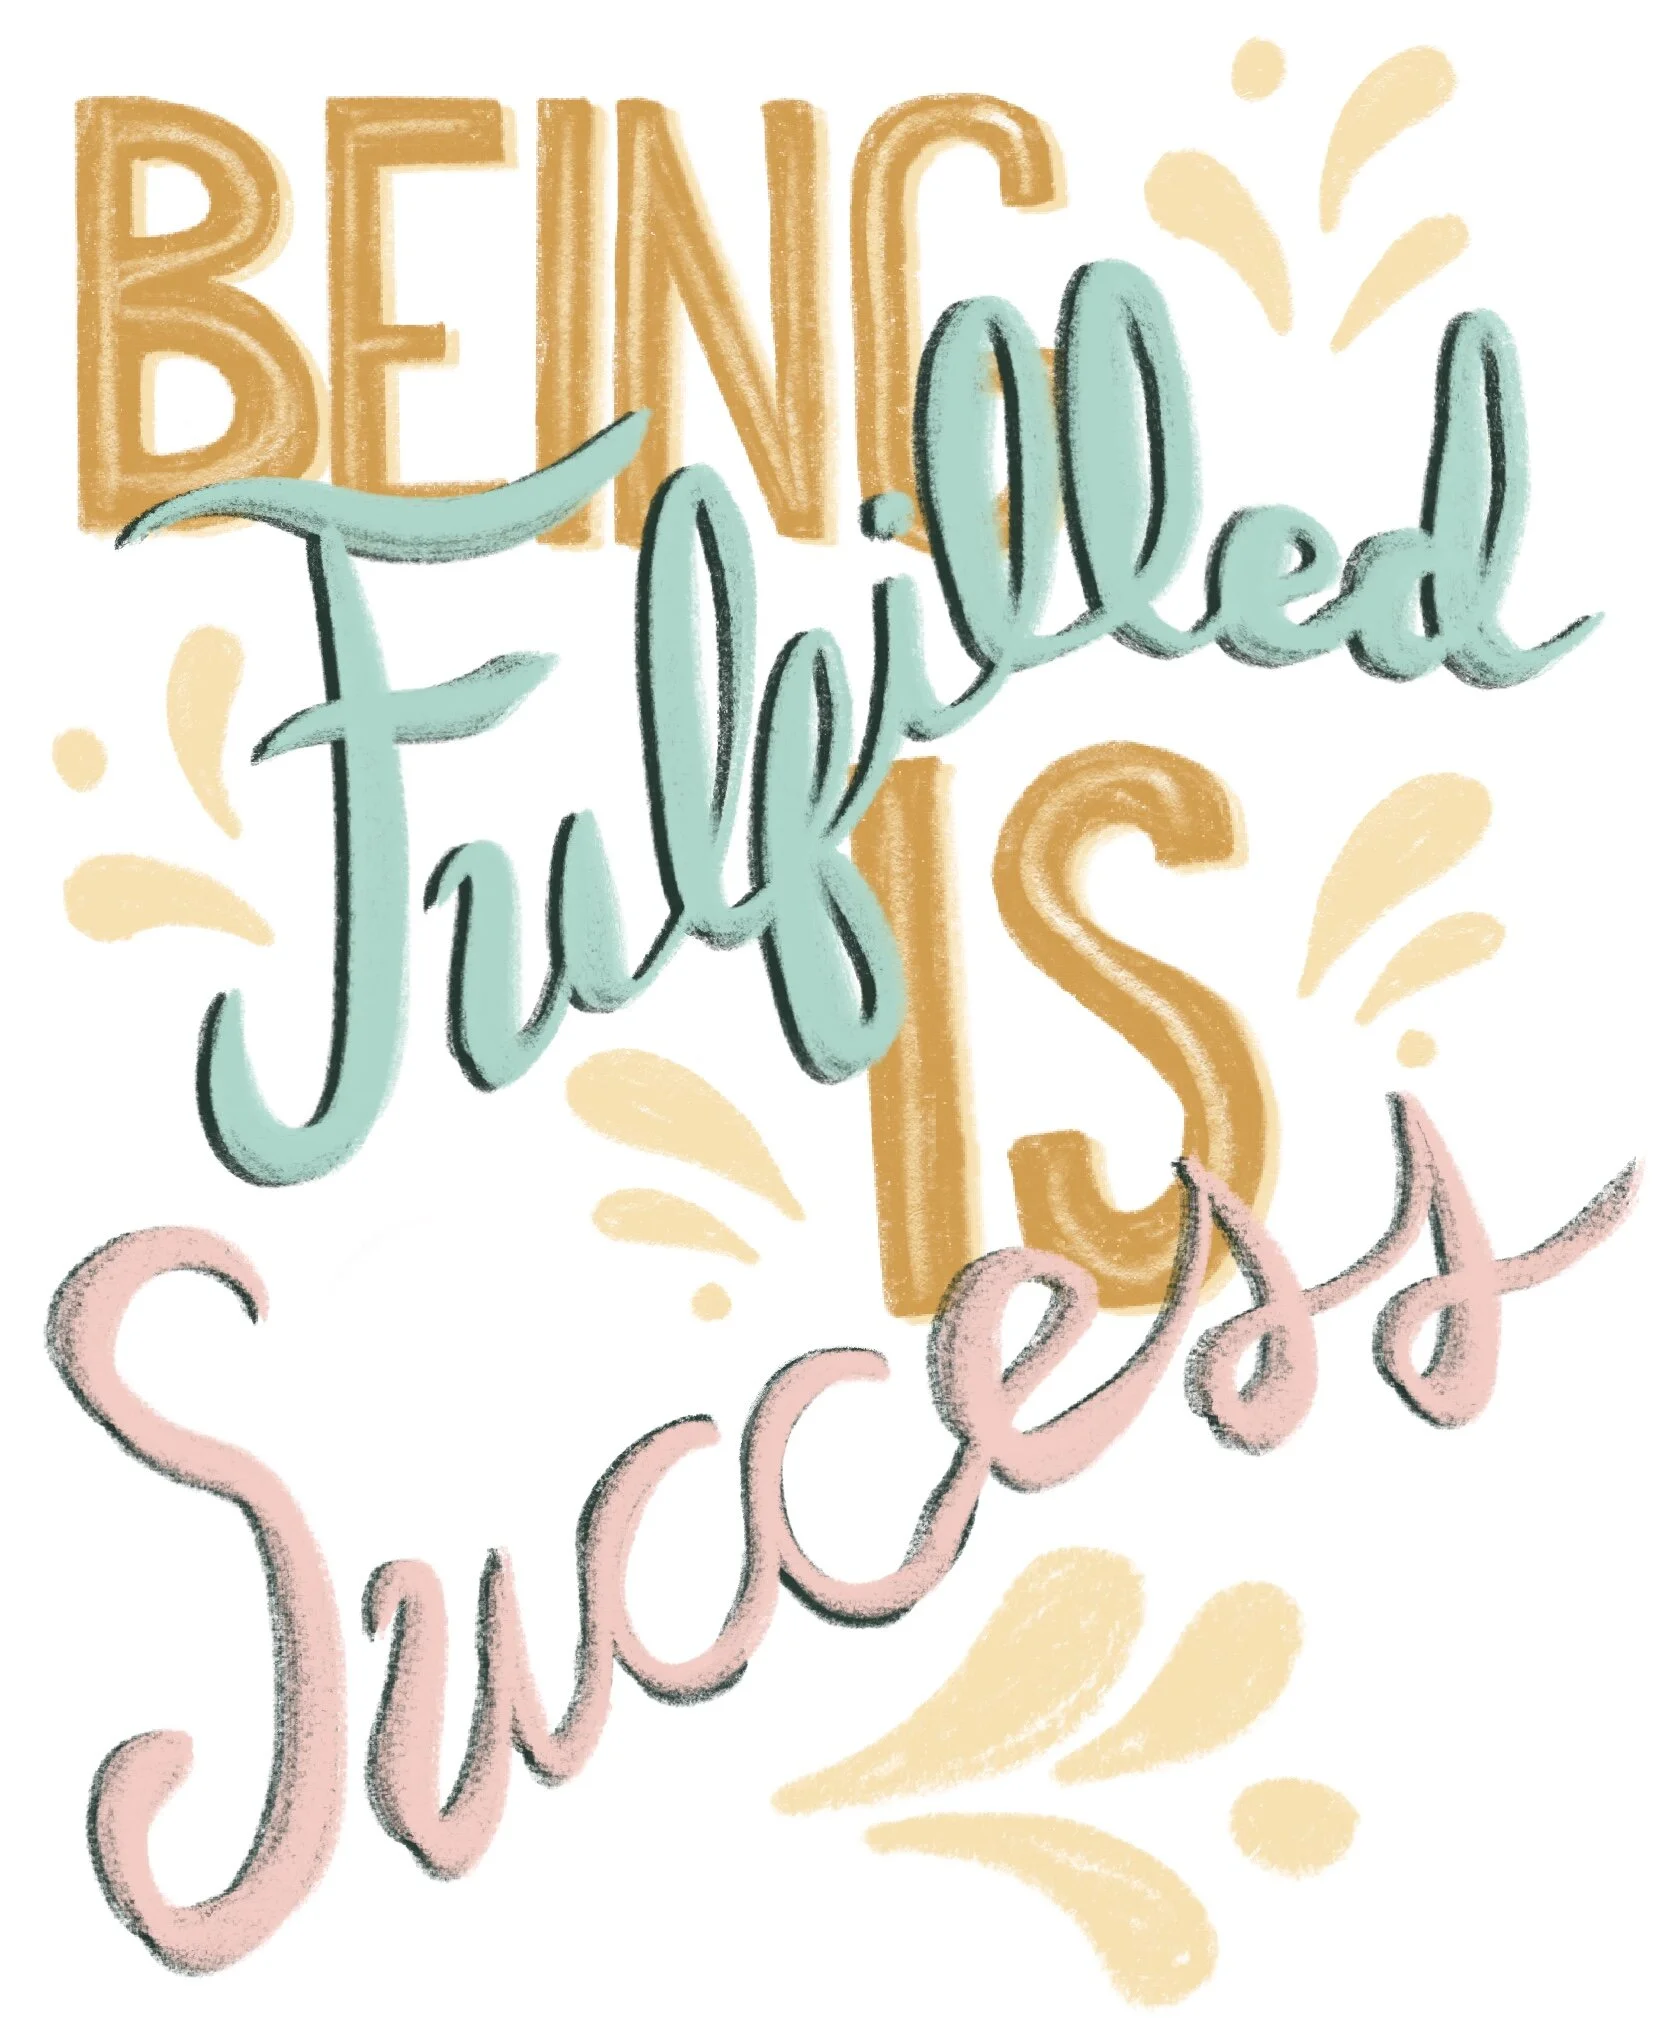
Success shouldn’t measured by your house or car and bank account. There are people who may lead you to believe the opposite. When people think of success they tend to think about material things. It’s like expensive material objects are receipts for they’re success. They may want you to believe that is how success is measured because they have the receipts to prove it. In all actuality you can have lots of nice things and not feel successful because you aren’t fulfilled. Fulfillment doesn’t mean meeting your wildest dreams. It’s the enrichment of your life. Did you do things today that made you happy? Did you give yourself the rest you needed? Did you learn something new? Did you spend time with someone you care about? Where you heard or allowed someone else to be heard? These enriching moments makes you feel fulfilled. Being fulfilled is success. It’s a receipt you don’t have but can still be seen. Try to take the time to ask yourself; have I enriched myself today? Tomorrow try focusing on that same idea. Make it a habit. If you measure your time on this earth not with possessions but with times you’ve felt fulfilled you won’t need those expensive receipts to be successful. No matter what, I’m proud of you.
Kindest regards,
Mickey